Blog

  • stm32f3-liar-test

    stm32f3-liar-test

    This is some work-in-progress test code for the liar benchmarking crate. At present, it is able to compile and
    run liar on an STM32F3 Discovery board, benchmark short functions using the
    Cortex-M DWT cycle counter, and present very simple results via semihosting.

    This is built on top of Jorge Aparicio’s embedded Rust work, including the
    xargo cross-compilation tool and his
    Cortex-M runtime. If you can get his
    quickstart examples running, you should
    be able to run this in much the same way.

    Output

    Right now, the code just dumps the liar::no_std::runner::Samples struct for each
    test run. I modified my copy of liar to perform 10 iterations per run_loop()
    with 4 samples per run(), so that it wouldn’t take all day nor spew pages of
    output. The output looks like this:

    liar test starting
    test results:
    units are average count of CPU clocks at 13.888889 nanoseconds each
    nop:
        981
        981
        981
        981
    foo:
        101144
        101144
        101144
        101144
    liar test finished
    

    License

    stm32f3-liar-test is licensed under the MIT/X11 license.

    Portions of the build scripts are from Jorge Aparicio’s
    cortex-m-quickstart project, copyright © 2017 Jorge
    Aparicio, as noted in the particular files. See
    https://github.com/japaric/cortex-m-quickstart for
    details.

    The remainder of stm32f3-liar-test is written by Sean Bolton,
    and licensed as follows:

    Copyright © 2017 Sean Bolton

    Permission is hereby granted, free of charge, to any
    person obtaining a copy of this software and associated
    documentation files (the “Software”), to deal in the
    Software without restriction, including without
    limitation the rights to use, copy, modify, merge,
    publish, distribute, sublicense, and/or sell copies of
    the Software, and to permit persons to whom the Software
    is furnished to do so, subject to the following
    conditions:

    The above copyright notice and this permission notice
    shall be included in all copies or substantial portions
    of the Software.

    THE SOFTWARE IS PROVIDED “AS IS”, WITHOUT WARRANTY OF
    ANY KIND, EXPRESS OR IMPLIED, INCLUDING BUT NOT LIMITED
    TO THE WARRANTIES OF MERCHANTABILITY, FITNESS FOR A
    PARTICULAR PURPOSE AND NONINFRINGEMENT. IN NO EVENT
    SHALL THE AUTHORS OR COPYRIGHT HOLDERS BE LIABLE FOR ANY
    CLAIM, DAMAGES OR OTHER LIABILITY, WHETHER IN AN ACTION
    OF CONTRACT, TORT OR OTHERWISE, ARISING FROM, OUT OF OR
    IN CONNECTION WITH THE SOFTWARE OR THE USE OR OTHER
    DEALINGS IN THE SOFTWARE.

    Visit original content creator repository
    https://github.com/theabolton/stm32f3-liar-test

  • Fractal-Models

    Parametrizable Fractals

    My models of some simple fractal geometries. Currently featuring Sierpinski Tetrahedra, Menger Sponges (inspired by Stand-up Maths) and related Sierpiński Carpets. Including STLs of each successuflly rendered model, Solidworks drawings and OpenSCAD code which can successfully render up to a level 4 sponge. Also included DXF and SVG drawings of the 2D carpets.

    OpenSCAD can technically preview the level 5 sponge with not very long a delay, but I have yet to find out how much time it would take for it to render/produce an STL of it. Level 4 took ~65 minutes to render into an STL-able model in OpenSCAD. I managed to create a level 5 in Solidworks by slow piecemeal patterning, but am not sure where that model went. The STL of that sponge is too large for GitHub but can be found on my GrabCad.

    I included a setting in the Sierpinski Tetrahedron generator to overlap the constituent subpyramids slightly for printability. I don’t know how much it helps and am haven’t totally worked out the math to make the overlap more elegant, but those STLs are in the printable_overlap folder.

    (more images available in /*/images directories)

    Models

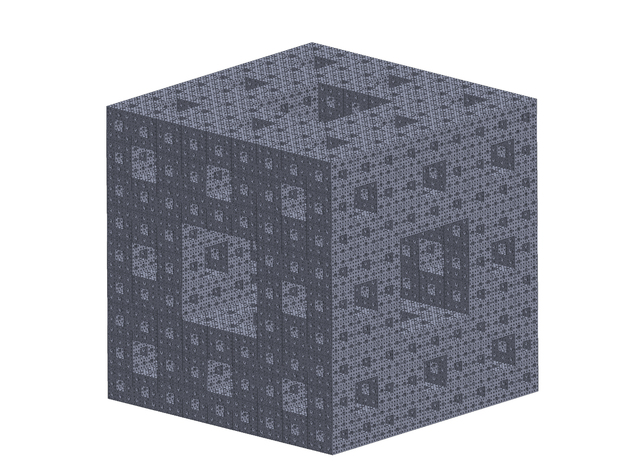
    Menger sponge level 5 model

    Render of a Level 5 Menger Sponge

    TetrahedronClip.mp4

    Sierpinski Pyramid level 7 Render

    Sierpinski Carpet level 6 model Render of a level 6 Sierpinski Carpet

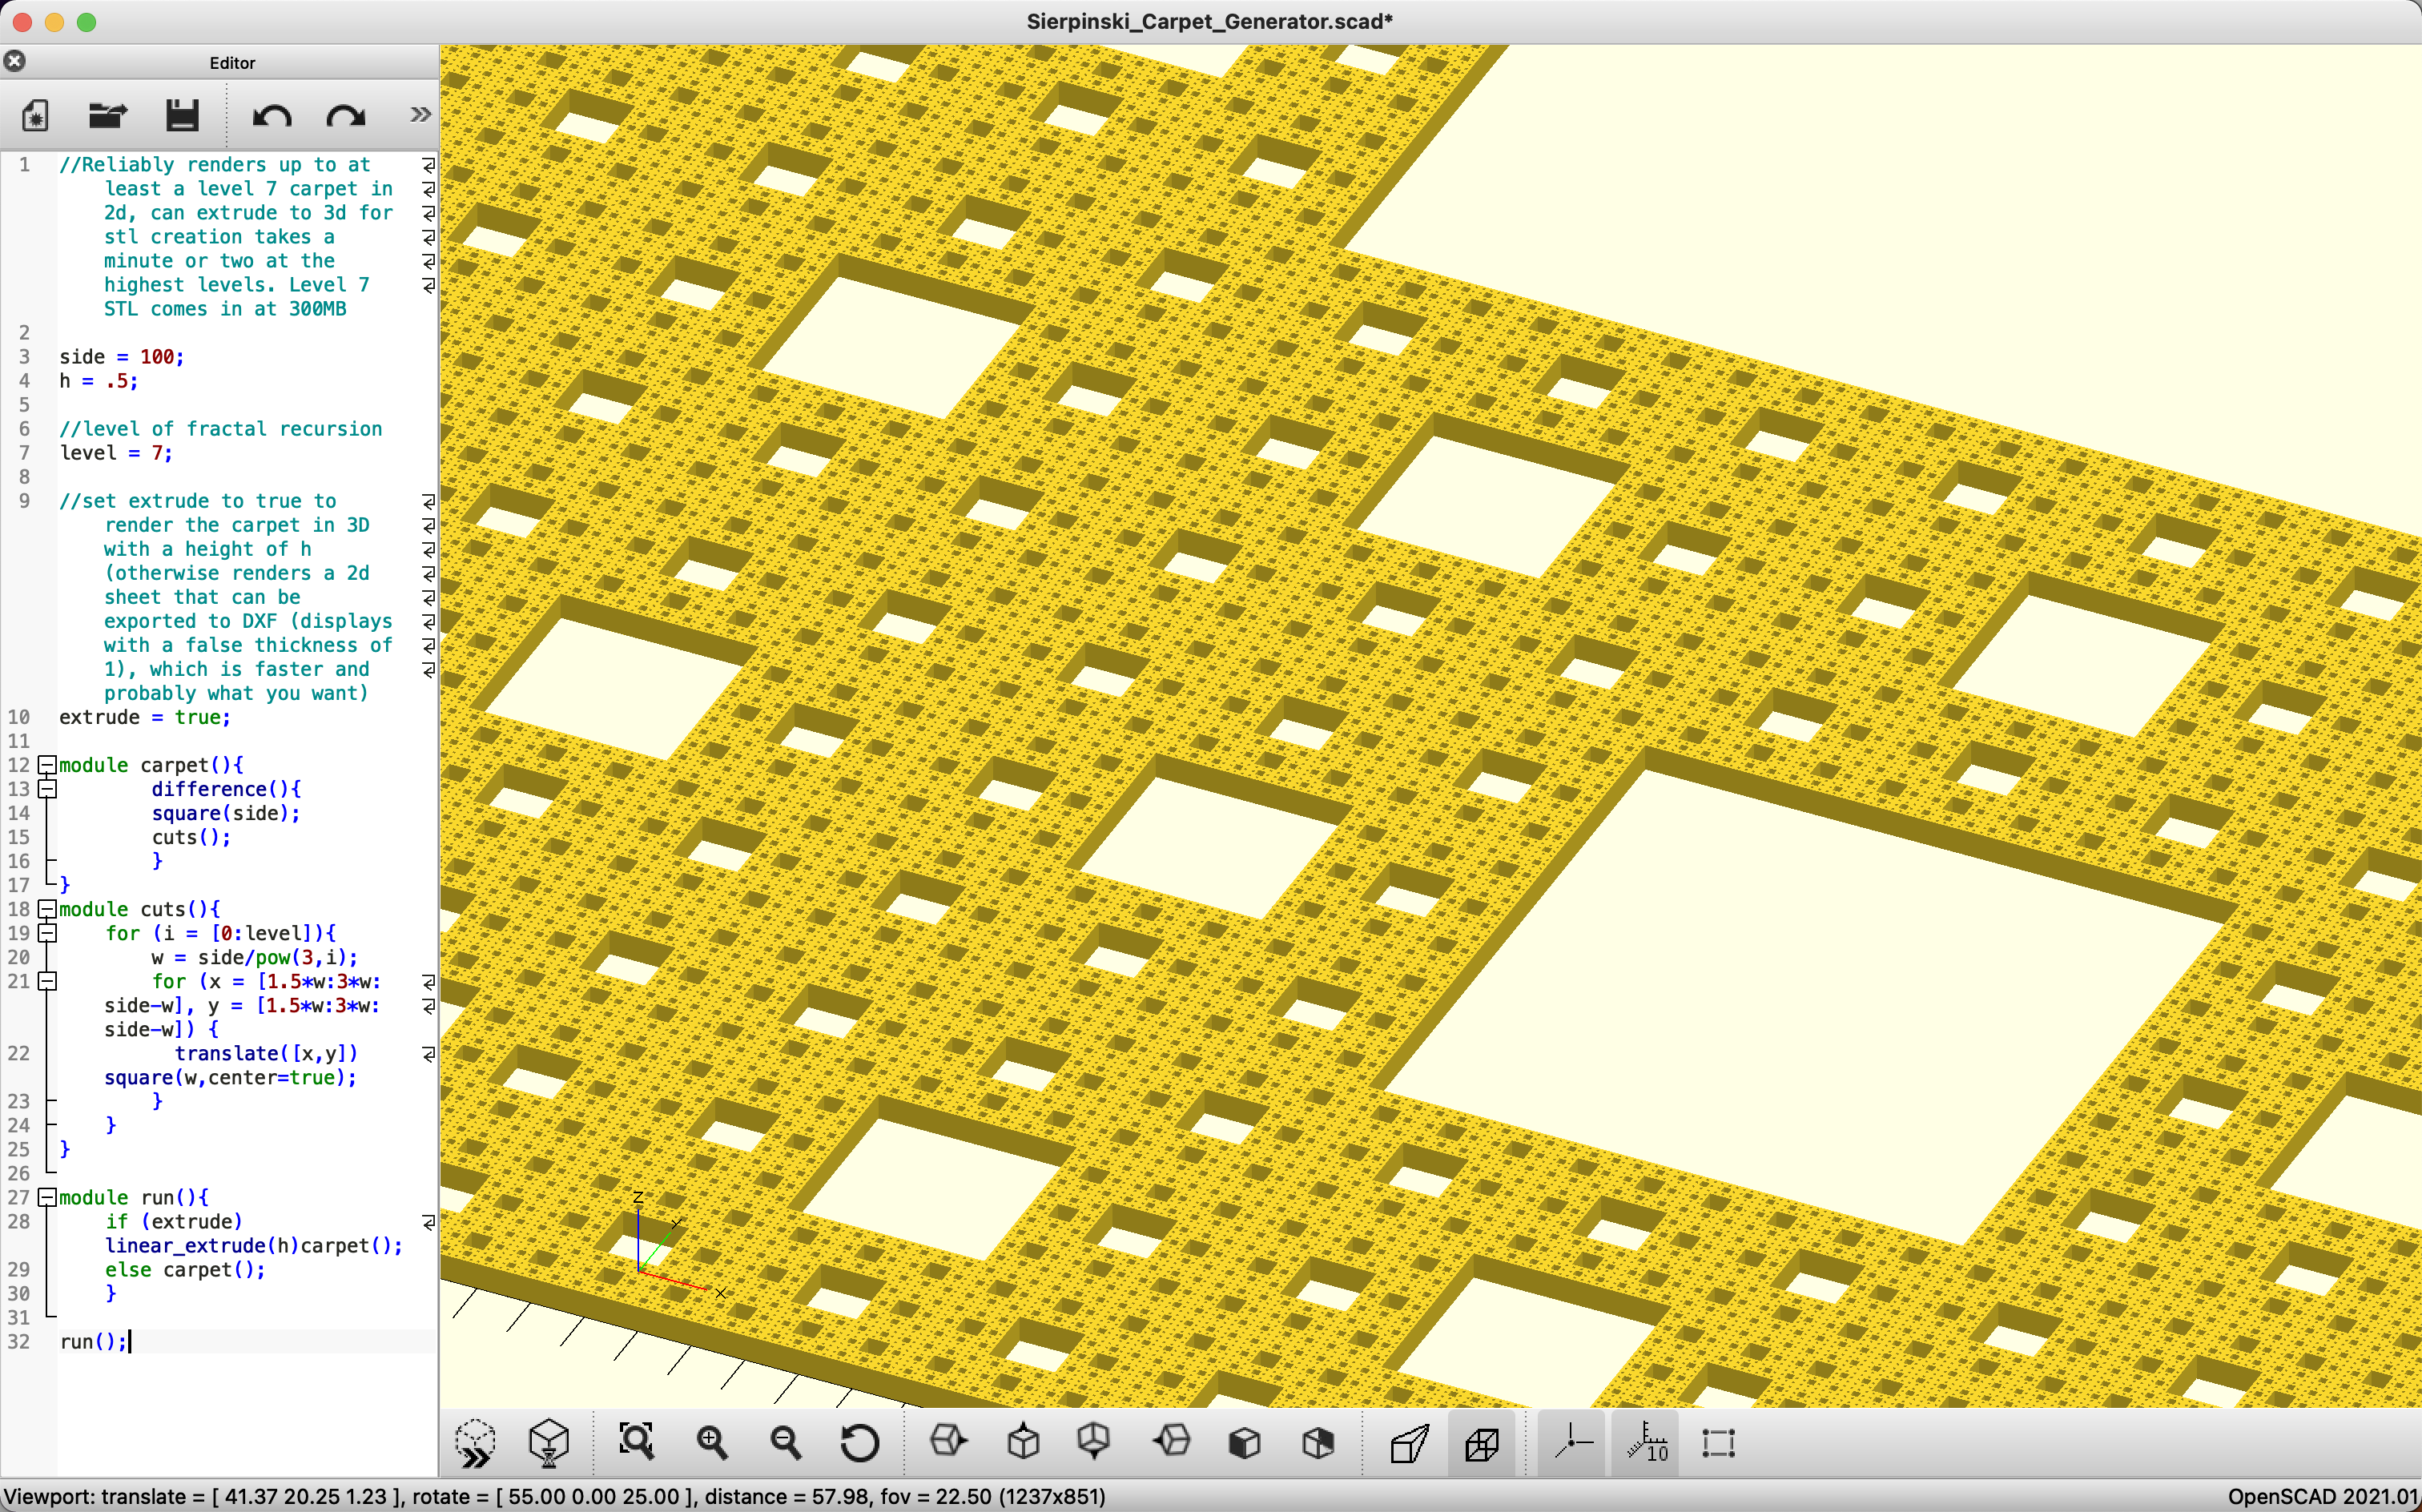
    Sierpinski Carpet level 7 in openSCAD viewport Render of a level 7 Sierpinski Carpet in OpenScad (this model has ~300,000 holes and the STL of the 3d model is 300MB)

    I managed to render a level 8 carpet in OpenSCAD, but even the 2D DXF is over 500MB which is too large even for GrabCAD. The SVG is a more modest 180MB but still too large for Github, and GrabCAD doesn’t take that file format. Available upon request.

    Execution

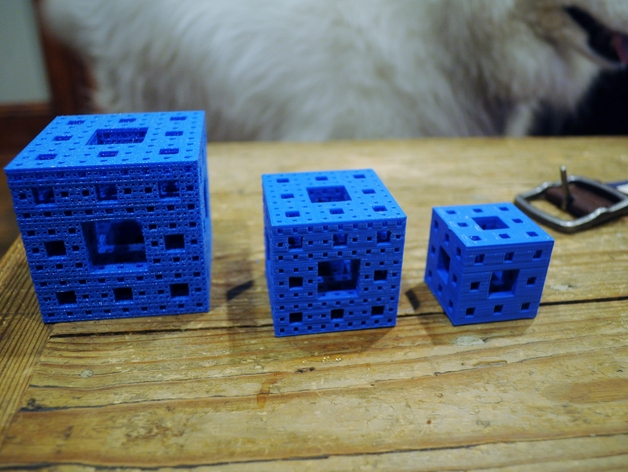
    Menger sponge levels 2,3, and 4 Print

    Sierpinski Carpet level 5 Lasercut

    Note: If attempting to view the largest Carpet images, the best way is probably to open the .svg file in e.g. Inkscape, and set display mode to Outline. I changed the stroke width from OpenSCAD’s default export setting of .5 so that they should be visible, but the easiest way to be able to zoom in on arbitrarily fine detail is to display without stroke widths at all.

    Visit original content creator repository https://github.com/briansmiley/Fractal-Models
  • opencat-gym

    OpenCat Gym

    A gym reinforcement learning environment for OpenCat robots based on Stable-Baselines3 and PyBullet.

    Simulation and Application

    Installation and Usage

    Install python packages:

    !pip install "stable-baselines3[extra]"
    !pip install pybullet

    Start training with

    python train.py 
    

    To take a look at the pre-trained example, execute

    python enjoy.py
    

    Alternatively you can run opencat-gym.ipyn in Jupyter notebook and perform training.

    Playing with training parameters

    The training parameters are listed as constants in the opencat-gym-env.py. They change the weight of the reward-function.

    PENALTY_STEPS = 2e6       # Increase of penalty by step_counter/PENALTY_STEPS
    FAC_MOVEMENT = 1000.0     # Reward movement in x-direction
    FAC_STABILITY = 0.1       # Punish body roll and pitch velocities
    FAC_Z_VELOCITY = 0.0      # Punish z movement of body
    FAC_SLIP = 0.0            # Punish slipping of paws
    FAC_ARM_CONTACT = 0.01    # Punish crawling on arms and elbows
    FAC_SMOOTH_1 = 1.0        # Punish jitter and vibrational movement, 1st order
    FAC_SMOOTH_2 = 1.0        # Punish jitter and vibrational movement, 2nd order
    FAC_CLEARANCE = 0.0       # Factor to enfore foot clearance to PAW_Z_TARGET
    PAW_Z_TARGET = 0.005      # Target height (m) of paw during swing phase

    Links

    For more information on the reinforcement training implementation: https://stable-baselines3.readthedocs.io/en/master/index.html
    And for the simulation environment please refer to: https://pybullet.org/wordpress/
    The API for creating the training environment: https://gymnasium.farama.org/

    Related Work

    The reward and penalty functions are based on: https://www.nature.com/articles/s41598-023-38259-7
    Including a joint angle history was inspired by: https://www.science.org/doi/10.1126/scirobotics.aau5872

    Visit original content creator repository https://github.com/ger01d/opencat-gym
  • UltiEconomy

    UltiEconomy

    使用方法介绍见:https://www.mcbbs.net/thread-1060351-1-1.html


    UltiEconomyAPI介绍

    如何在你的项目中设置UltiEconomyAPI

    首先是将UltiEconomy.jar导入项目。

    然后你需要做的是在主类里新建一个UltiEconomy对象。

    private static UltiEconomyAPI economy;

    并且你需要一个getter用来在其他类里获取economy。

    public static UltiEconomyAPI getEconomy() {
        return economy;
    }

    接着最好在主类里新建一个setup方法,用来检测依赖,虽然可以在plugin.yml中添加依赖,但是如果能弹出自定义的提醒不是更好吗?

    private Boolean setupEconomy() {
        if (getServer().getPluginManager().getPlugin("UltiEconomy") != null) {
            economy = new UltiEconomy();
            return true;
        }
        return false;
    }

    再接着就需要在:onEnable()里添加代码。

    在一切开始之前先检测是否找到经济前置:

    if (!setupEconomy()){
        getServer().getConsoleSender().sendMessage("无法找到经济前置插件,关闭本插件。。。");
        getServer().getPluginManager().disablePlugin(this);
        return;
    }

    OK,一切初始化设置完成,接下来你只要在你的其他类里调用: getEconomy() 即可获取到economy对象。
    例如:

    UltiEconomyAPI economy = ExamplePlugin.getEconomy();

    更多的方法调用请看doc文件夹下的Javadoc。
    这里举几个常用的:

    // 查看玩家现金
    economy.checkMoney(Player.getName())
    // 查看玩家银行存款
    economy.checkBank(Player.getName())
    // 减少玩家现金
    economy.takeFrom(Player.getName(), 10.00)
    // 减少玩家存款
    economy.takeFromBank(Player.getName(), 10.00)
    // 添加玩家现金
    economy.addTo(Player.getName(), 11.11)
    // 添加玩家存款
    economy.addToBank(Player.getName(), 22.3344)

    完整代码实例:

    在主类中:

    public final class ExamplePlugin extends JavaPlugin {
    
        private static UltiEconomyAPI economy;
    
        public static UltiEconomyAPI getEconomy() {
            return economy;
        }
    
        private Boolean setupEconomy() {
            if (getServer().getPluginManager().getPlugin("UltiEconomy") != null) {
                economy = new UltiEconomy();
                return true;
            }
            return false;
        }
        
        @Override
        public void onEnable() {
            plugin = this;
    
            if (!setupEconomy()){
                getServer().getConsoleSender().sendMessage("无法找到经济前置插件,关闭本插件。。。");
                getServer().getPluginManager().disablePlugin(this);
                return;
            }
            
            getServer().getConsoleSender().sendMessage("插件已加载!");
        }
        
        @Override
        public void onDisable() {
            getServer().getConsoleSender().sendMessage("插件已卸载!");
        }
    }

    在其他类中

    public class subClass implements CommandExecutor {
    
        @Override
        public boolean onCommand(CommandSender commandSender, Command command, String s, String[] strings) {
            if (commandSender instanceof Player) {
                Player player = (Player) commandSender;
                UltiEconomyAPI economy = ExamplePlugin.getEconomy();
                if (command.getName().equalsIgnoreCase("money") && strings.length == 0) {
                    player.sendMessage("你有" + economy.checkMoney(player.getName()) + "枚货币!");
                    return true;
                }
            }
            return false;
        }
    }

    你可以在我的源码中看到更多的例子,这里就不一一列举了。感谢使用!

    当然也有另一个调用方法,直接使用UltiCoreAPI调用经济系统,UltiCoreAPI已经实现了Vault的封装,在找不到UltiEconomy的情况下会自动调用Vault。

    详细可以见:https://app.gitbook.com/@wisdomme/s/ulticoreapi/

    源码:https://github.com/wisdommen/UltiCore-Core

    Visit original content creator repository
    https://github.com/wisdommen/UltiEconomy

  • ChooseMyCSS

    Choose My CSS plugin for MantisBT

    Copyright (c) 2020 Association Cocktail, Marc-Antoine TURBET-DELOF

    Description

    ChooseMyCSS is a plugin for MantisBT that allows the administrator to add some CSS files optional or mandatory for users.

    Admin users create and name CSS files.

    Some may be taged as mandatory. Then, they are all included for all users.

    The others (not tagged as mandatory) can be chosen by stanard users to be applied in addition.

    Change Log

    See the Change log.

    Installation

    Requirements

    The plugin requires MantisBT 2.24 (not tested on earlier releases).

    Setup Instructions

    1. Download or clone a copy of the plugin’s code.
    2. Copy the plugin (the ChooseMyCSS/ directory) into your Mantis installation’s plugins/ directory.
    3. While logged in as an administrator, go to Manage → Manage Plugins.
    4. In the Available Plugins list, you’ll find the ChooseMyCSS plugin; click the Install link.
    5. In the Installed Plugins list, click on the ChooseMyCSS plugin to configure it.
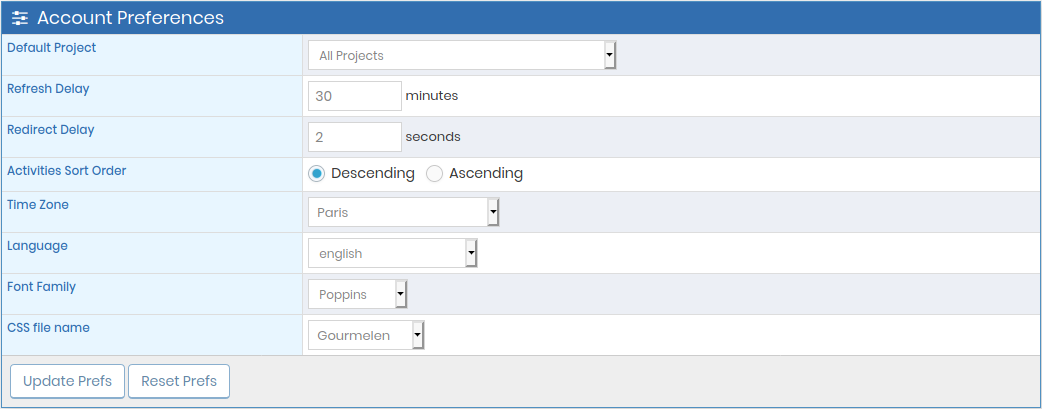
    6. Users can choose an optional CSS file in My account → Preferences.

    Configuration

    The list of additional CSS files can be defined on the plugin’s config page.

    Specify, for each file, if it’s optional or mandatory.

    All CSS files will be used before mandatory one chosen by a user.

    If you chose multi mandatory CSS files, they will be added in the order in which they are displayed.

    Screen Shots

    In the plugin config page Manage → Manage Plugins → ChooseMyCSS

    add CSS file

    edit CSS files

    In user preferences page My account → Preferences or Manage → Manage Users → login → Account Preferences

    choose CSS file

    Support

    If you wish to file a bug report, or have questions related to use and installation, please use the plugin’s issues tracker on GitHub.

    All code contributions (bug fixes, new features and enhancements, translations) are welcome and highly encouraged, preferably as a Pull Request.

    The latest source code is available on GitHub.

    Visit original content creator repository https://github.com/mantisbt-plugins/ChooseMyCSS
  • fem-omelette-recipe-page

    Frontend Mentor – Recipe page solution

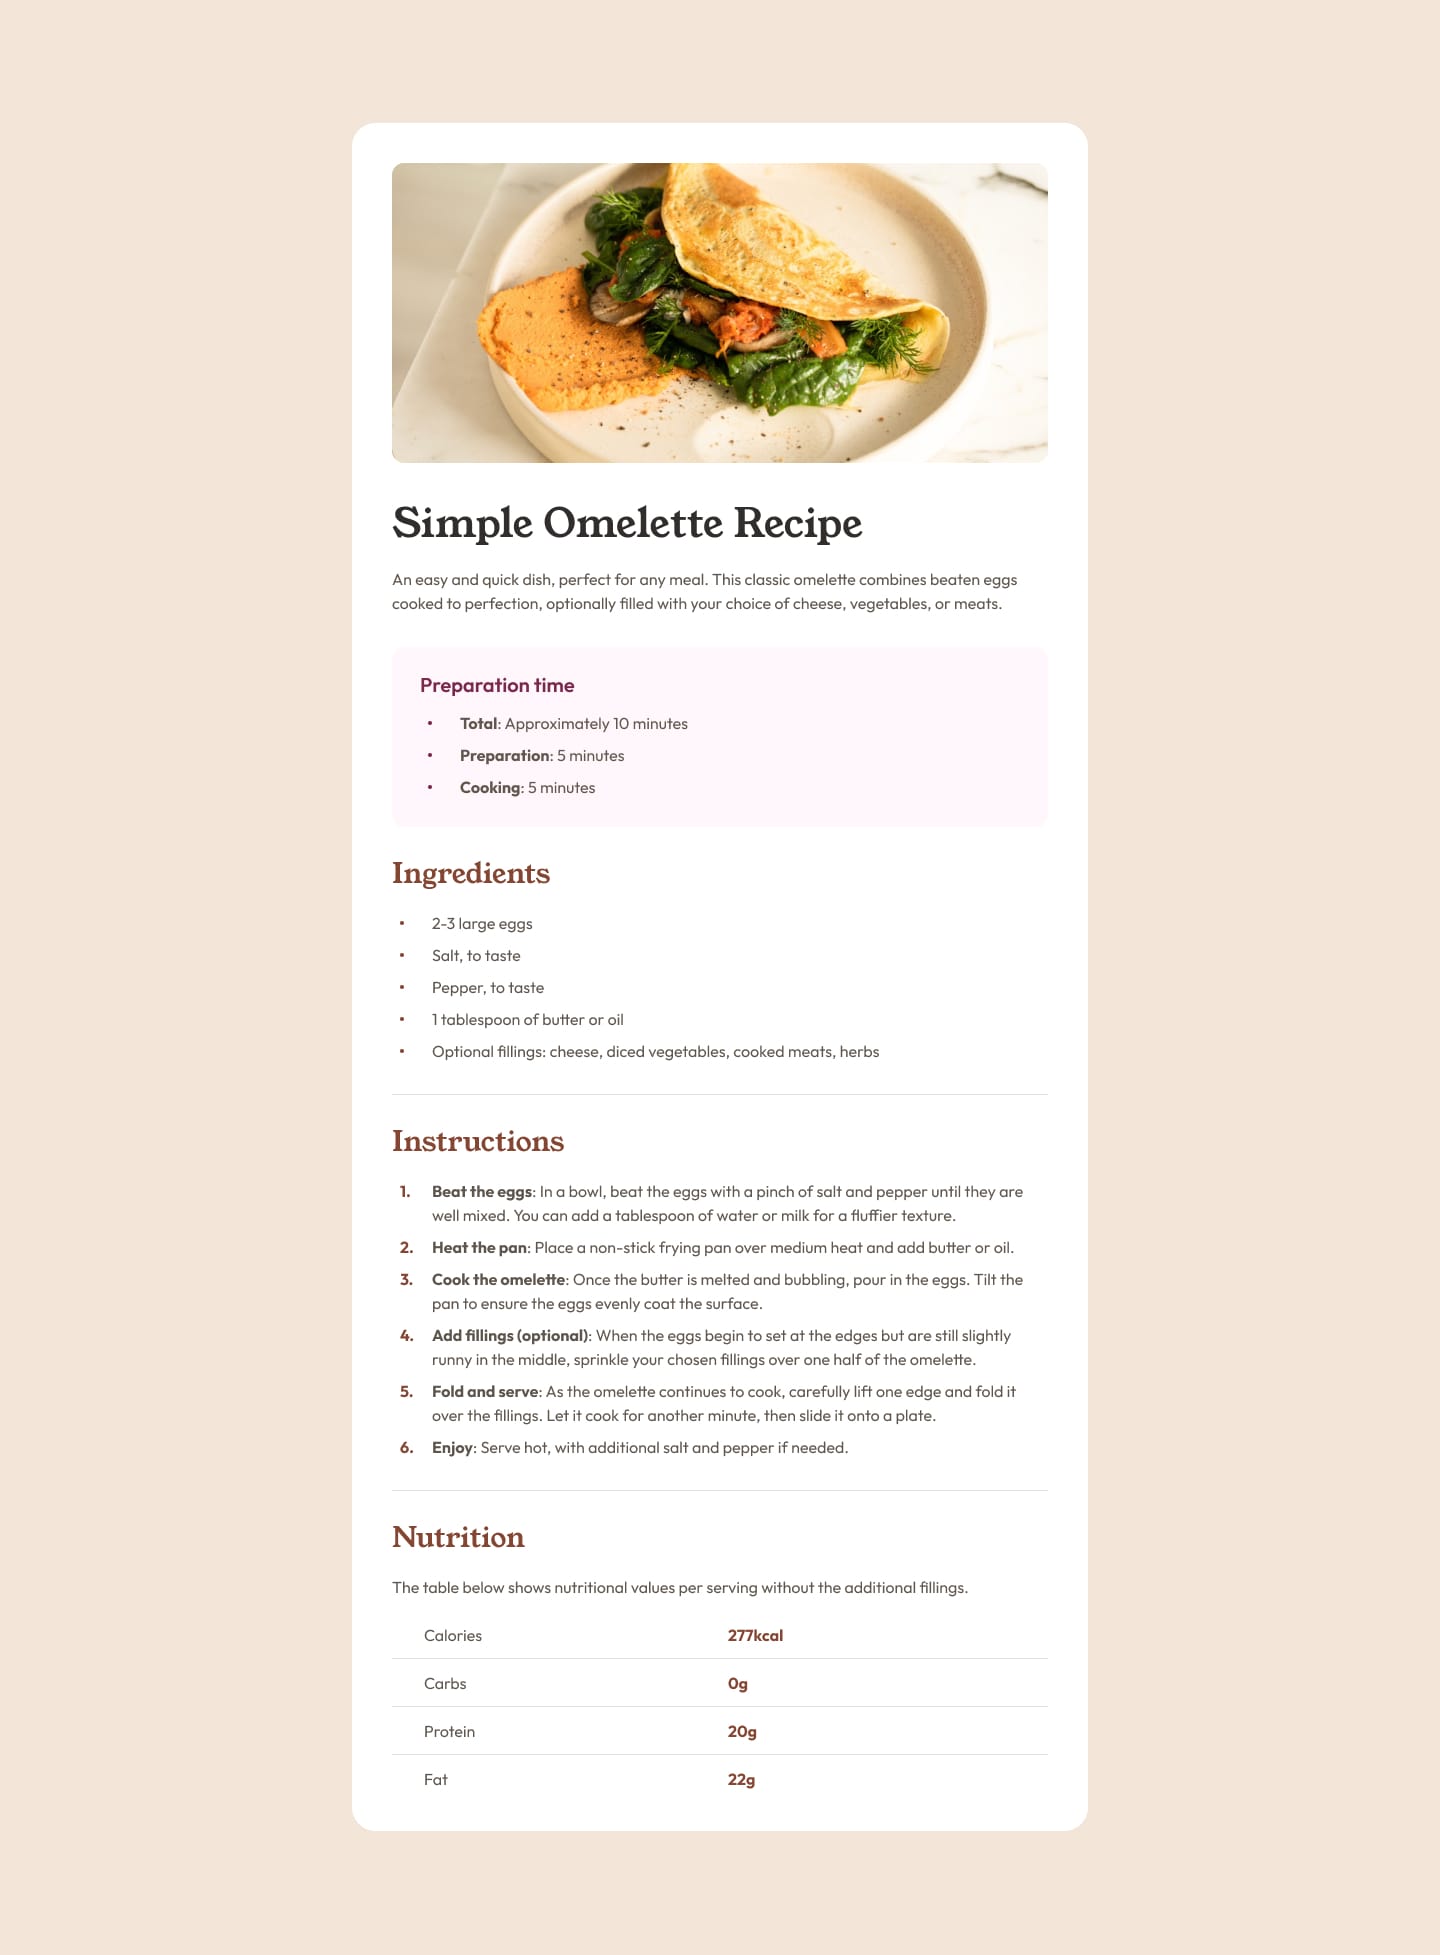
    This is a solution to the Recipe page challenge on Frontend Mentor. Frontend Mentor challenges help you improve your coding skills by building realistic projects.

    Table of contents

    Overview

    Screenshot

    desktop_view mobile_view

    Links

    My process

    Useful resources

    • Semantic HTML – This is an amazing article which helped me finally understand semantic HTML tags. I’d recommend it to anyone still learning this concept.
    • BEM Methodology – The idea behind it is to divide the user interface into independent blocks. I really liked this pattern and will use it going forward.
    • MDN (ARIA) – Accessible Rich Internet Applications (ARIA)
    • Flexbox – This complete guide explains everything about flexbox, focusing on all the different possible properties for the parent element (the flex container) and the child elements (the flex items).
    • Schemas.org – A collaborative, community activity with a mission to create, maintain, and promote schemas for structured data.
    • The Open Graph protocol – The Open Graph protocol enables any web page to become a rich object in a social graph.

    Features

    • Semantic HTML: The page uses semantic HTML tags to enhance readability and accessibility.
    • Responsive Design: Adaptable to various screen sizes using CSS media queries.
    • Accessible Content: Includes ARIA roles and attributes, Open Graph meta tags for social media sharing, and SEO-friendly descriptions.
    • Structured Data: Incorporates schema.org microdata to provide structured information about the recipe (e.g., ingredients, nutrition, cooking time).
    • Custom Styling: Styled with Google Fonts and a custom CSS file.

    Highlights

    • Preparation time, ingredients, and step-by-step instructions.
    • Nutritional information table.
    • Fully optimized for accessibility and SEO.

    Technologies Used

    • HTML5: For the structure of the webpage.
    • CSS3: For styling the page (using a separate stylesheet).
    • Google Fonts: For custom typography (Outfit and Young Serif).
    • Open Graph Protocol: For enhancing social media link previews.
    • schema.org: For structured data to improve search engine visibility.

    Benefits

    • Search Engine Optimization: The microdata ensures search engines can understand the content better, improving its ranking and rich snippets.
    • Enhanced Usability: Screen readers can now interpret the purpose and structure of the content more effectively.
    • Security and Performance: External links are safer with rel="noopener noreferrer".

    Author

    Happy Coding! 🚀

    Visit original content creator repository https://github.com/josemguerra/fem-omelette-recipe-page
  • hcxbtdumptool

    hcxbtdumptool

    Small tool to capture packets from Bluetooth devices.

    Initial commit – no Bluetooth functions – only help and version menue and Bluetooth device information available.

    This is a playground to get some knowledge about coding Bluetooth.

    Everything is high experimental.

    Similar to hcxdumptool (WiFi) we use ioctl() system calls to control the device.

    Brief description

    Stand-alone binaries – designed to run on Raspberry Pi’s with installed Arch Linux.
    It may work on other Linux systems (notebooks, desktops) and distributions, too.

    Detailed description

    Tool Description
    hcxbtdumptool Tool to dump Bluetooth packets

    Get source

    git clone https://github.com/ZerBea/hcxbtdumptool.git
    cd hcxbtdumptool
    

    Compile

    make
    make install (as super user)
    

    Requirements

    • Operatingsystem: Arch Linux (strict), Kernel >= 5.4 (strict). It may work on other Linux systems (notebooks, desktops) and distributions, too (no support for other distributions, no support for other operating systems)

    • gcc 10 recommended (deprecated versions are not supported: https://gcc.gnu.org/)

    • bluetooth and libbluetooth-dev installed

    • Raspberry Pi A, B, A+, B+, Zero (WH). (Recommended: Zero (WH) or A+, because of a very low power consumption), but notebooks and desktops may work, too.

    • GPIO hardware mod recommended (push button and LED).

    Adapters

    VENDOR MODEL ID
    generic CSR 4.0 devic ID 0a12:0001 Cambridge Silicon Radio, Ltd Bluetooth Dongle (HCI mode)
    DELOCK CLASS 1 EDR 150m ID 0a12:0001 Cambridge Silicon Radio, Ltd Bluetooth Dongle (HCI mode)


    Visit original content creator repository
    https://github.com/ZerBea/hcxbtdumptool

  • gravity

    Visit original content creator repository
    https://github.com/tradestatistics/gravity

  • JusticiaLabIA

    Logo de JusticiaLabIA

    JusticiaLabIA 🤖💡

    Descripción

    JusticiaLabIA es un agente de IA especializado en el 1er Concurso de Innovación de la Rama Judicial 2024. Te ayudará a entender el concurso, preparar tu propuesta y resolver tus dudas.

    Funcionalidades

    • Brinda información sobre las fases, requisitos, criterios de evaluación e incentivos del concurso.
    • Guía en la preparación de propuestas, desde la identificación de necesidades hasta la presentación efectiva.
    • Responde preguntas frecuentes y aclara dudas específicas.
    • Ofrece consejos y recursos para fomentar la creatividad y la innovación en la justicia.

    Instalación

    1. Asegúrate de tener Python 3.8 o superior instalado en tu máquina.

    2. Clona este repositorio: git clone https://github.com/bladealex9848/JusticiaLabIA.git

    3. Navega al directorio del proyecto: cd JusticiaLabIA

    4. Instala las dependencias: pip install -r requirements.txt

    5. Crea un archivo .streamlit/secrets.toml y añade tu ASSISTANT_ID de OpenAI:

      ASSISTANT_ID = "tu-assistant-id-aqui"
      OPENAI_API_KEY = "tu-clave-api-aqui"
      
    6. Configura tu clave API de OpenAI como variable de entorno o en el archivo secrets.toml.

    Uso

    1. Ejecuta la aplicación: streamlit run app.py
    2. Abre tu navegador y ve a http://localhost:8501
    3. Comienza a interactuar con el Asistente Virtual escribiendo tus preguntas o solicitudes.

    Contribuciones

    Las contribuciones son bienvenidas. Por favor, haz un fork del repositorio, crea una nueva rama para tus cambios, y envía un pull request.

    Licencia

    Este proyecto está bajo la licencia MIT. Consulta el archivo LICENSE para más detalles.

    Autor

    Creado por Alexander Oviedo Fadul

    GitHub | Website | LinkedIn | Instagram | Twitter | Facebook | WhatsApp

    Visit original content creator repository https://github.com/bladealex9848/JusticiaLabIA
  • ytb-thumbnail-analyser

    YouTube Thumbnail Analyzer

    This project is a web application that analyzes YouTube thumbnail images using AI to provide scores and improvement suggestions. It consists of a FastAPI backend and a React frontend.

    Features

    • Upload YouTube thumbnail images
    • Analyze thumbnails using AI (powered by Groq API)
    • Provide scores and improvement suggestions for thumbnails
    • Store analysis results in a database

    Project Structure

    The project is divided into two main parts:

    1. Backend (FastAPI)
    2. Frontend (React + TypeScript + Vite)

    Backend

    The backend is a FastAPI application that handles image uploads, analysis, and database operations.

    Key components:

    • FastAPI application
    • SQLAlchemy for database operations
    • Groq API integration for image analysis
    • Error handling and environment configuration

    Frontend

    The frontend is a React application built with TypeScript and Vite, providing a user interface for thumbnail uploads and result display.

    Key components:

    • React with TypeScript
    • Vite for build and development
    • Tailwind CSS for styling
    • Various UI components and utilities

    Installation

    Prerequisites

    • Docker and Docker Compose
    • Node.js (for local frontend development)
    • Python 3.11+ (for local backend development)

    Setup

    1. Clone the repository:

      git clone https://github.com/UgolinOlle/ytb-thumbnail-analyser.git
      cd ytb-thumbnail-analyser
      
    2. Move the .env.local file in the root directory to .env and complete it with your own credentials

      mv .env.local .env
      
    3. Move the .env.local file in the backend directory to .env and complete it with your own credentials

      cd backend
      mv .env.local .env
      
    4. Build and run the Docker containers:

      docker-compose up --build
      
    5. The application should now be running:

    Development

    Backend

    To run the backend locally for development:

    1. Navigate to the backend directory
      cd backend
      
    2. Create a virtual environment and activate it

      python -m venv venv
      source venv/bin/activate
      
    3. Install dependencies: pip install -r requirements.txt
    4. Run the FastAPI server: uvicorn app.main:app --reload

    Frontend

    To run the frontend locally for development:

    1. Navigate to the frontend directory
      cd frontend
      
    2. Install dependencies: yarn
    3. Start the development server: yarn dev

    API Documentation

    Once the backend is running, you can access the API documentation at:

    License

    This project is licensed under the MIT License.

    Visit original content creator repository
    https://github.com/UgolinOlle/ytb-thumbnail-analyser