Blog

  • freecell-rs

    ♣️♥️♠️♦️
    FreeCell

    crates.io docs.rs


    Game objects and rules for the solitaire card game FreeCell, written in Rust. The goal of this crate is to aid in the implementation of both a FreeCell game and solvers for FreeCell.

    THIS PROJECT IS A WORK IN PROGRESS. While the basic features are mostly implemented, most of the optimisations useful for efficient solvers are still missing.

    Table of Contents

    FreeCell Rules

    This library uses the following rules of FreeCell:

    • Construction and layout
      • One standard 52-card deck is used.
      • There are four open freecells and four open foundations.
      • Cards are dealt face-up into eight cascades, four of which comprise seven cards each and four of which comprise six cards each.
    • Building during play
      • The top card of each cascade begins a tableau.
      • Tableaus must be built down by alternating colors.
      • Foundations are built up by suit.
    • Moves
      • Any freecell card or top card of any cascade may be moved to build on a tableau, or moved to an empty cell, an empty cascade, or its foundation.
      • Complete or partial tableaus may be moved to build on existing tableaus, or moved to empty cascades, by recursively placing and removing cards through intermediate locations.
    • The game is won after all cards are moved to their foundation piles.

    All cards are face-up at all times. Not all deals are solvable, but the probability of an unsolvable deal is very low. It is estimated that 99.999% of possible deals are solvable.

    Source: Wikipedia

    Usage

    The central struct of this crate is GameState, which represents the state of the board (i.e. the positions of all cards) at one point during the course of a game. It can be used to check whether a given move is allowed in this state…

    // TODO add example

    …or to generate all moves that the player can make in this game state, each of them paired with the game state they would result in.

    // TODO add example

    On top of these, GameState provides numerous other methods useful for dealing with board states.

    Parsing

    Almost all structs provided by this crate implement FromStr. Parsing is case-insensitive for each of them. The format for parsing any of those structs is the same as the format used by their Debug and Display implementations. This means that the output of Display and Debug can be converted back to the original object:

    // TODO add example (cascade)

    In the following the formats for each of the structs will be explained in detail.

    Parsing Cards

    Cards can be represented using a short or a long format.

    The short format consists of two or three characters where the first one or two characters denote the card’s rank and the last character denotes the suit. The character(s) denoting the rank must either be a number between 1 and 13 or one of “A” for Ace, “T” for 10, “J” for Jack, “Q” for Queen or “K” for King. The character denoting the suit must be one of “C” for Club, “S” for Spade, “H” for Heart or “D” for Diamond.

    assert_eq!(Ok(Card { suit: Diamond, rank: ACE }), "AD".parse());
    assert_eq!(Ok(Card { suit: Club, rank: 4 }), "4C".parse());
    assert_eq!(Ok(Card { suit: Heart, rank: 10 }), "th".parse());

    The long format is of the form <rank> of <suit>, optionally with an s at the end. The rank can either be the rank’s number (in digits) or its name.

    assert_eq!(Ok(Card { suit: Diamond, rank: JACK }), "Jack of Diamonds".parse());
    assert_eq!(Ok(Card { suit: Club, rank: 3 }), "3 of club".parse());

    These three structs can be represented as sequences of cards, optionally separeted by spaces, commas or both.

    All four foundations are represented by one sequence of up to four cards, where each of the provided cards indicates the highest card on that foundation. Therefore, at most one card of each suit should be provided. The order of the cards does not matter here, as foundations are always stored in the same order internally.

    Freecells can be parsed from a sequence of at most four cards. Each of the cards can be replaced with empty, to indicate that the corresponding freecell is empty. The order of the cards does matter for freecells.

    // TODO add examples (one for each of the 3 structs)

    Parsing GameStates

    TODO explain the format for GameState

    GameState::from_file(path) can be used if the game state’s description is stored in a file.

    Serialization

    If the "serialization" feature is enabled, the Serialize and Deserialize traits from serde are implemented for all types exported by this crate.

    Roadmap

    Before a feature is ticked off as completed, it must be thoroughly tested, well-documented and released on crates.io.

    • Release 1.0.0
      • Provide structs for implementing a FreeCell game
      • Allow parsing those structs from strings
    • Allow generating a random starting board
    • Provide additional, optimised structs for implementing a FreeCell solver

    The optimisations mentioned in the last bullet point primarily aim at reducing the branching factor, for example

    • If multiple moves result in equivalent game states, legal_moves() only returns one of those moves (e.g. moving a card to freecell 1 vs. moving it to freecell 2)
    • Eq treats equivalent game states as equal
    • legal_moves() only returns one move if there is an obvious safe move (like moving an ace to a foundation)

    The goal is to make searching for a solution significantly faster.

    Contributing

    Feedback, suggestions and other contributions are always welcome!

    If you notice a bug, please open an issue.

    For pull requests, we ask that all contributed code follows Rust’s style guidelines (within reason).

    License

    Licensed under either of Apache License, Version 2.0 or MIT license at your option.

    Visit original content creator repository https://github.com/ArmanMielke/freecell-rs
  • Historia_clinica_psicologica

                        GNU GENERAL PUBLIC LICENSE
                           Version 2, June 1991
    
     Copyright (C) 1989, 1991 Free Software Foundation, Inc.,
     51 Franklin Street, Fifth Floor, Boston, MA 02110-1301 USA
     Everyone is permitted to copy and distribute verbatim copies
     of this license document, but changing it is not allowed.
    
                                Preamble
    
      The licenses for most software are designed to take away your
    freedom to share and change it.  By contrast, the GNU General Public
    License is intended to guarantee your freedom to share and change free
    software--to make sure the software is free for all its users.  This
    General Public License applies to most of the Free Software
    Foundation's software and to any other program whose authors commit to
    using it.  (Some other Free Software Foundation software is covered by
    the GNU Lesser General Public License instead.)  You can apply it to
    your programs, too.
    
      When we speak of free software, we are referring to freedom, not
    price.  Our General Public Licenses are designed to make sure that you
    have the freedom to distribute copies of free software (and charge for
    this service if you wish), that you receive source code or can get it
    if you want it, that you can change the software or use pieces of it
    in new free programs; and that you know you can do these things.
    
      To protect your rights, we need to make restrictions that forbid
    anyone to deny you these rights or to ask you to surrender the rights.
    These restrictions translate to certain responsibilities for you if you
    distribute copies of the software, or if you modify it.
    
      For example, if you distribute copies of such a program, whether
    gratis or for a fee, you must give the recipients all the rights that
    you have.  You must make sure that they, too, receive or can get the
    source code.  And you must show them these terms so they know their
    rights.
    
      We protect your rights with two steps: (1) copyright the software, and
    (2) offer you this license which gives you legal permission to copy,
    distribute and/or modify the software.
    
      Also, for each author's protection and ours, we want to make certain
    that everyone understands that there is no warranty for this free
    software.  If the software is modified by someone else and passed on, we
    want its recipients to know that what they have is not the original, so
    that any problems introduced by others will not reflect on the original
    authors' reputations.
    
      Finally, any free program is threatened constantly by software
    patents.  We wish to avoid the danger that redistributors of a free
    program will individually obtain patent licenses, in effect making the
    program proprietary.  To prevent this, we have made it clear that any
    patent must be licensed for everyone's free use or not licensed at all.
    
      The precise terms and conditions for copying, distribution and
    modification follow.
    
                        GNU GENERAL PUBLIC LICENSE
       TERMS AND CONDITIONS FOR COPYING, DISTRIBUTION AND MODIFICATION
    
      0. This License applies to any program or other work which contains
    a notice placed by the copyright holder saying it may be distributed
    under the terms of this General Public License.  The "Program", below,
    refers to any such program or work, and a "work based on the Program"
    means either the Program or any derivative work under copyright law:
    that is to say, a work containing the Program or a portion of it,
    either verbatim or with modifications and/or translated into another
    language.  (Hereinafter, translation is included without limitation in
    the term "modification".)  Each licensee is addressed as "you".
    
    Activities other than copying, distribution and modification are not
    covered by this License; they are outside its scope.  The act of
    running the Program is not restricted, and the output from the Program
    is covered only if its contents constitute a work based on the
    Program (independent of having been made by running the Program).
    Whether that is true depends on what the Program does.
    
      1. You may copy and distribute verbatim copies of the Program's
    source code as you receive it, in any medium, provided that you
    conspicuously and appropriately publish on each copy an appropriate
    copyright notice and disclaimer of warranty; keep intact all the
    notices that refer to this License and to the absence of any warranty;
    and give any other recipients of the Program a copy of this License
    along with the Program.
    
    You may charge a fee for the physical act of transferring a copy, and
    you may at your option offer warranty protection in exchange for a fee.
    
      2. You may modify your copy or copies of the Program or any portion
    of it, thus forming a work based on the Program, and copy and
    distribute such modifications or work under the terms of Section 1
    above, provided that you also meet all of these conditions:
    
        a) You must cause the modified files to carry prominent notices
        stating that you changed the files and the date of any change.
    
        b) You must cause any work that you distribute or publish, that in
        whole or in part contains or is derived from the Program or any
        part thereof, to be licensed as a whole at no charge to all third
        parties under the terms of this License.
    
        c) If the modified program normally reads commands interactively
        when run, you must cause it, when started running for such
        interactive use in the most ordinary way, to print or display an
        announcement including an appropriate copyright notice and a
        notice that there is no warranty (or else, saying that you provide
        a warranty) and that users may redistribute the program under
        these conditions, and telling the user how to view a copy of this
        License.  (Exception: if the Program itself is interactive but
        does not normally print such an announcement, your work based on
        the Program is not required to print an announcement.)
    
    These requirements apply to the modified work as a whole.  If
    identifiable sections of that work are not derived from the Program,
    and can be reasonably considered independent and separate works in
    themselves, then this License, and its terms, do not apply to those
    sections when you distribute them as separate works.  But when you
    distribute the same sections as part of a whole which is a work based
    on the Program, the distribution of the whole must be on the terms of
    this License, whose permissions for other licensees extend to the
    entire whole, and thus to each and every part regardless of who wrote it.
    
    Thus, it is not the intent of this section to claim rights or contest
    your rights to work written entirely by you; rather, the intent is to
    exercise the right to control the distribution of derivative or
    collective works based on the Program.
    
    In addition, mere aggregation of another work not based on the Program
    with the Program (or with a work based on the Program) on a volume of
    a storage or distribution medium does not bring the other work under
    the scope of this License.
    
      3. You may copy and distribute the Program (or a work based on it,
    under Section 2) in object code or executable form under the terms of
    Sections 1 and 2 above provided that you also do one of the following:
    
        a) Accompany it with the complete corresponding machine-readable
        source code, which must be distributed under the terms of Sections
        1 and 2 above on a medium customarily used for software interchange; or,
    
        b) Accompany it with a written offer, valid for at least three
        years, to give any third party, for a charge no more than your
        cost of physically performing source distribution, a complete
        machine-readable copy of the corresponding source code, to be
        distributed under the terms of Sections 1 and 2 above on a medium
        customarily used for software interchange; or,
    
        c) Accompany it with the information you received as to the offer
        to distribute corresponding source code.  (This alternative is
        allowed only for noncommercial distribution and only if you
        received the program in object code or executable form with such
        an offer, in accord with Subsection b above.)
    
    The source code for a work means the preferred form of the work for
    making modifications to it.  For an executable work, complete source
    code means all the source code for all modules it contains, plus any
    associated interface definition files, plus the scripts used to
    control compilation and installation of the executable.  However, as a
    special exception, the source code distributed need not include
    anything that is normally distributed (in either source or binary
    form) with the major components (compiler, kernel, and so on) of the
    operating system on which the executable runs, unless that component
    itself accompanies the executable.
    
    If distribution of executable or object code is made by offering
    access to copy from a designated place, then offering equivalent
    access to copy the source code from the same place counts as
    distribution of the source code, even though third parties are not
    compelled to copy the source along with the object code.
    
      4. You may not copy, modify, sublicense, or distribute the Program
    except as expressly provided under this License.  Any attempt
    otherwise to copy, modify, sublicense or distribute the Program is
    void, and will automatically terminate your rights under this License.
    However, parties who have received copies, or rights, from you under
    this License will not have their licenses terminated so long as such
    parties remain in full compliance.
    
      5. You are not required to accept this License, since you have not
    signed it.  However, nothing else grants you permission to modify or
    distribute the Program or its derivative works.  These actions are
    prohibited by law if you do not accept this License.  Therefore, by
    modifying or distributing the Program (or any work based on the
    Program), you indicate your acceptance of this License to do so, and
    all its terms and conditions for copying, distributing or modifying
    the Program or works based on it.
    
      6. Each time you redistribute the Program (or any work based on the
    Program), the recipient automatically receives a license from the
    original licensor to copy, distribute or modify the Program subject to
    these terms and conditions.  You may not impose any further
    restrictions on the recipients' exercise of the rights granted herein.
    You are not responsible for enforcing compliance by third parties to
    this License.
    
      7. If, as a consequence of a court judgment or allegation of patent
    infringement or for any other reason (not limited to patent issues),
    conditions are imposed on you (whether by court order, agreement or
    otherwise) that contradict the conditions of this License, they do not
    excuse you from the conditions of this License.  If you cannot
    distribute so as to satisfy simultaneously your obligations under this
    License and any other pertinent obligations, then as a consequence you
    may not distribute the Program at all.  For example, if a patent
    license would not permit royalty-free redistribution of the Program by
    all those who receive copies directly or indirectly through you, then
    the only way you could satisfy both it and this License would be to
    refrain entirely from distribution of the Program.
    
    If any portion of this section is held invalid or unenforceable under
    any particular circumstance, the balance of the section is intended to
    apply and the section as a whole is intended to apply in other
    circumstances.
    
    It is not the purpose of this section to induce you to infringe any
    patents or other property right claims or to contest validity of any
    such claims; this section has the sole purpose of protecting the
    integrity of the free software distribution system, which is
    implemented by public license practices.  Many people have made
    generous contributions to the wide range of software distributed
    through that system in reliance on consistent application of that
    system; it is up to the author/donor to decide if he or she is willing
    to distribute software through any other system and a licensee cannot
    impose that choice.
    
    This section is intended to make thoroughly clear what is believed to
    be a consequence of the rest of this License.
    
      8. If the distribution and/or use of the Program is restricted in
    certain countries either by patents or by copyrighted interfaces, the
    original copyright holder who places the Program under this License
    may add an explicit geographical distribution limitation excluding
    those countries, so that distribution is permitted only in or among
    countries not thus excluded.  In such case, this License incorporates
    the limitation as if written in the body of this License.
    
      9. The Free Software Foundation may publish revised and/or new versions
    of the General Public License from time to time.  Such new versions will
    be similar in spirit to the present version, but may differ in detail to
    address new problems or concerns.
    
    Each version is given a distinguishing version number.  If the Program
    specifies a version number of this License which applies to it and "any
    later version", you have the option of following the terms and conditions
    either of that version or of any later version published by the Free
    Software Foundation.  If the Program does not specify a version number of
    this License, you may choose any version ever published by the Free Software
    Foundation.
    
      10. If you wish to incorporate parts of the Program into other free
    programs whose distribution conditions are different, write to the author
    to ask for permission.  For software which is copyrighted by the Free
    Software Foundation, write to the Free Software Foundation; we sometimes
    make exceptions for this.  Our decision will be guided by the two goals
    of preserving the free status of all derivatives of our free software and
    of promoting the sharing and reuse of software generally.
    
                                NO WARRANTY
    
      11. BECAUSE THE PROGRAM IS LICENSED FREE OF CHARGE, THERE IS NO WARRANTY
    FOR THE PROGRAM, TO THE EXTENT PERMITTED BY APPLICABLE LAW.  EXCEPT WHEN
    OTHERWISE STATED IN WRITING THE COPYRIGHT HOLDERS AND/OR OTHER PARTIES
    PROVIDE THE PROGRAM "AS IS" WITHOUT WARRANTY OF ANY KIND, EITHER EXPRESSED
    OR IMPLIED, INCLUDING, BUT NOT LIMITED TO, THE IMPLIED WARRANTIES OF
    MERCHANTABILITY AND FITNESS FOR A PARTICULAR PURPOSE.  THE ENTIRE RISK AS
    TO THE QUALITY AND PERFORMANCE OF THE PROGRAM IS WITH YOU.  SHOULD THE
    PROGRAM PROVE DEFECTIVE, YOU ASSUME THE COST OF ALL NECESSARY SERVICING,
    REPAIR OR CORRECTION.
    
      12. IN NO EVENT UNLESS REQUIRED BY APPLICABLE LAW OR AGREED TO IN WRITING
    WILL ANY COPYRIGHT HOLDER, OR ANY OTHER PARTY WHO MAY MODIFY AND/OR
    REDISTRIBUTE THE PROGRAM AS PERMITTED ABOVE, BE LIABLE TO YOU FOR DAMAGES,
    INCLUDING ANY GENERAL, SPECIAL, INCIDENTAL OR CONSEQUENTIAL DAMAGES ARISING
    OUT OF THE USE OR INABILITY TO USE THE PROGRAM (INCLUDING BUT NOT LIMITED
    TO LOSS OF DATA OR DATA BEING RENDERED INACCURATE OR LOSSES SUSTAINED BY
    YOU OR THIRD PARTIES OR A FAILURE OF THE PROGRAM TO OPERATE WITH ANY OTHER
    PROGRAMS), EVEN IF SUCH HOLDER OR OTHER PARTY HAS BEEN ADVISED OF THE
    POSSIBILITY OF SUCH DAMAGES.
    
                         END OF TERMS AND CONDITIONS
    
                How to Apply These Terms to Your New Programs
    
      If you develop a new program, and you want it to be of the greatest
    possible use to the public, the best way to achieve this is to make it
    free software which everyone can redistribute and change under these terms.
    
      To do so, attach the following notices to the program.  It is safest
    to attach them to the start of each source file to most effectively
    convey the exclusion of warranty; and each file should have at least
    the "copyright" line and a pointer to where the full notice is found.
    
        <one line to give the program's name and a brief idea of what it does.>
        Copyright (C) <year>  <name of author>
    
        This program is free software; you can redistribute it and/or modify
        it under the terms of the GNU General Public License as published by
        the Free Software Foundation; either version 2 of the License, or
        (at your option) any later version.
    
        This program is distributed in the hope that it will be useful,
        but WITHOUT ANY WARRANTY; without even the implied warranty of
        MERCHANTABILITY or FITNESS FOR A PARTICULAR PURPOSE.  See the
        GNU General Public License for more details.
    
        You should have received a copy of the GNU General Public License along
        with this program; if not, write to the Free Software Foundation, Inc.,
        51 Franklin Street, Fifth Floor, Boston, MA 02110-1301 USA.
    
    Also add information on how to contact you by electronic and paper mail.
    
    If the program is interactive, make it output a short notice like this
    when it starts in an interactive mode:
    
        Gnomovision version 69, Copyright (C) year name of author
        Gnomovision comes with ABSOLUTELY NO WARRANTY; for details type `show w'.
        This is free software, and you are welcome to redistribute it
        under certain conditions; type `show c' for details.
    
    The hypothetical commands `show w' and `show c' should show the appropriate
    parts of the General Public License.  Of course, the commands you use may
    be called something other than `show w' and `show c'; they could even be
    mouse-clicks or menu items--whatever suits your program.
    
    You should also get your employer (if you work as a programmer) or your
    school, if any, to sign a "copyright disclaimer" for the program, if
    necessary.  Here is a sample; alter the names:
    
      Yoyodyne, Inc., hereby disclaims all copyright interest in the program
      `Gnomovision' (which makes passes at compilers) written by James Hacker.
    
      <signature of Ty Coon>, 1 April 1989
      Ty Coon, President of Vice
    
    This General Public License does not permit incorporating your program into
    proprietary programs.  If your program is a subroutine library, you may
    consider it more useful to permit linking proprietary applications with the
    library.  If this is what you want to do, use the GNU Lesser General
    Public License instead of this License.
    

    Visit original content creator repository
    https://github.com/Arcado03/Historia_clinica_psicologica

  • Discord-Vanity-URL-Sniper

    Discord-Vanity-URL-Sniper

    Discord.js v14 Compatible Discord Custom Vanity Url Sniper Bot Engine and Codes are Now Free With This Infrastructure You Will Know that You Can Get the Custom Url You Want to Your Discord Server with This Infrastructure!

    The free version does not have the following features and has a time limit of 4 seconds. In the free version, certain parts are encrypted code and not open source.


    Paid Version Features:

    – You can adjust the working speed according to your request. It works at 1 millisecond speed if you want.
    – You can adjust the bot status.
    – There is a log feature that notifies your Discord server. (If the urlyi system receives it, it gives you quick information.)
    – The ability to set the working status alone.
    – Completely open source code.


    Download NodeJS: https://nodejs.org/
    Download Visual Studio Code: https://code.visualstudio.com/download
    Discord Developers: https://discord.dev
    Discord Permission: https://bit.ly/3L4RZpi


    Visit original content creator repository https://github.com/umutxyp/Discord-Vanity-URL-Sniper
  • appwrite-db-migration

    BSD 3-Clause License
    
    Copyright (c) 2023, Andrei Panamarenka
    
    Redistribution and use in source and binary forms, with or without
    modification, are permitted provided that the following conditions are met:
    
    1. Redistributions of source code must retain the above copyright notice, this
       list of conditions and the following disclaimer.
    
    2. Redistributions in binary form must reproduce the above copyright notice,
       this list of conditions and the following disclaimer in the documentation
       and/or other materials provided with the distribution.
    
    3. Neither the name of the copyright holder nor the names of its
       contributors may be used to endorse or promote products derived from
       this software without specific prior written permission.
    
    THIS SOFTWARE IS PROVIDED BY THE COPYRIGHT HOLDERS AND CONTRIBUTORS "AS IS"
    AND ANY EXPRESS OR IMPLIED WARRANTIES, INCLUDING, BUT NOT LIMITED TO, THE
    IMPLIED WARRANTIES OF MERCHANTABILITY AND FITNESS FOR A PARTICULAR PURPOSE ARE
    DISCLAIMED. IN NO EVENT SHALL THE COPYRIGHT HOLDER OR CONTRIBUTORS BE LIABLE
    FOR ANY DIRECT, INDIRECT, INCIDENTAL, SPECIAL, EXEMPLARY, OR CONSEQUENTIAL
    DAMAGES (INCLUDING, BUT NOT LIMITED TO, PROCUREMENT OF SUBSTITUTE GOODS OR
    SERVICES; LOSS OF USE, DATA, OR PROFITS; OR BUSINESS INTERRUPTION) HOWEVER
    CAUSED AND ON ANY THEORY OF LIABILITY, WHETHER IN CONTRACT, STRICT LIABILITY,
    OR TORT (INCLUDING NEGLIGENCE OR OTHERWISE) ARISING IN ANY WAY OUT OF THE USE
    OF THIS SOFTWARE, EVEN IF ADVISED OF THE POSSIBILITY OF SUCH DAMAGE.
    

    Visit original content creator repository
    https://github.com/sjke/appwrite-db-migration

  • Netflix

    This is a Next.js project bootstrapped with create-next-app.

    Getting Started

    First, run the development server:

    npm run dev
    # or
    yarn dev

    Open http://localhost:3000 with your browser to see the result.

    You can start editing the page by modifying pages/index.js. The page auto-updates as you edit the file.

    API routes can be accessed on http://localhost:3000/api/hello. This endpoint can be edited in pages/api/hello.js.

    The pages/api directory is mapped to /api/*. Files in this directory are treated as API routes instead of React pages.

    Setup Local Environment

    You need to setup a few API keys for this project to be setup correctly otherwise you won’t see any videos.

    For that, you need to create a .env.local file in your project as shown in docs that will look like this:

    NEXT_PUBLIC_HASURA_ADMIN_URL=<REPLACE THIS>
    JWT_SECRET=<REPLACE THIS>
    NEXT_PUBLIC_HASURA_ADMIN_SECRET=<REPLACE THIS>
    MAGIC_SERVER_KEY=<REPLACE THIS>
    NEXT_PUBLIC_MAGIC_PUBLISHABLE_API_KEY=<REPLACE THIS>
    YOUTUBE_API_KEY=<REPLACE THIS>
    

    You can retrieve the above environment values by referring their docs linked above and once retrieved, paste above accordingly.

    *** Important: Videos from Youtube ***

    During local development, we recommend you to add the environment variable DEVELOPMENT=true as that won’t fetch videos from the Youtube API and instead access it from data/videos.json. Youtube API does have a quota and this way you can continue doing local development without worrying about running out of API calls.

    Learn More

    To learn more about Next.js, take a look at the following resources:

    You can check out the Next.js GitHub repository – your feedback and contributions are welcome!

    Deploy on Vercel

    The easiest way to deploy your Next.js app is to use the Vercel Platform from the creators of Next.js.

    Check out our Next.js deployment documentation for more details.

    Visit original content creator repository
    https://github.com/armanamini/Netflix

  • designing-multiagent-systems

    Multi-Agent Systems with AutoGen

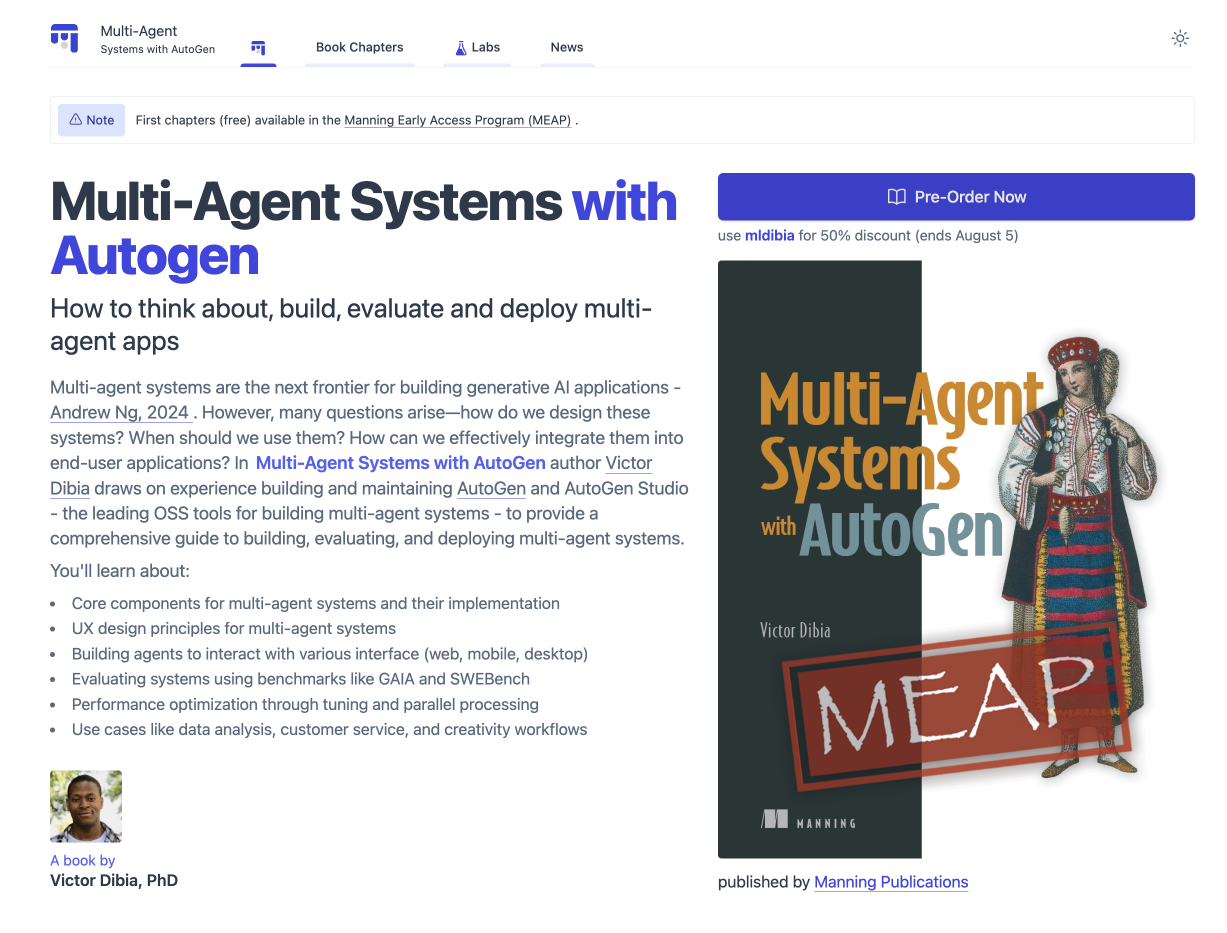
    This repository contains code examples for building multi-agent applications (powered by generative AI models) based on the AutoGen framework and is the official code repository for the book – Multi-Agent Systems with AutoGen, published by Manning Publications.

    Multi-Agent Systems with AutoGen Manning Early Access Program

    The book is currently available for pre-order in the Manning Early Access Program (only the first few chapters are available currently).

    Pre-order the book now at https://mng.bz/eVP9.

    Tip

    🔥🔥 Use the code mldibia for a 50% discount, valid until August 5th.

    In Multi-Agent Systems with AutoGen, you will learn about the core components of agents (Generative AI models, tools, memory, orchestration), how to implement them in python code using the AutoGen framework, how to evaluate, optimize and deploy them in your applications. Overall, the book will cover:

    • Core components for multi-agent systems and their implementation
    • UX design principles for multi-agent systems
    • Building agents to interact with various interface (web, mobile, desktop)
    • Evaluating your multi-agent system using benchmarks like GAIA, GPTQ, SWEBench and your own custom benchmarks
    • Performance optimization (e.g., agent-specific model tuning and parallel processing)
    • Use case deep dives like data analysis, customer service, and creativity workflows.

    Useful Links

    Note

    If you downloaded the code bundle from the Manning website, please consider visiting the official code repository on GitHub at https://github.com/victordibia/designing-multiagent-systems for the latest updates.

    To download a copy of this code repository, click on the Download Zip button or run the following code from your terminal.

    git clone --depth 1 https https://github.com/victordibia/designing-multiagent-systems.git

    Getting Jupyter Notebooks to work on your computer

    This section explains how to install the pre-requisite libraries so that you can use the notebooks within this book. So that the libraries are safely installed for the context of this book, we use the python virtual environment concept.

    1. Install Python on your computer. Recommended versions are 3.9 through 3.12
    2. Clone the repository: git clone https://github.com/victordibia/designing-multiagent-systems.git
    3. Go into the directory: cd designing-multiagent-systems
    4. Create a virtual environment: python -m venv venv
    5. Activate the virtual environment: . ./venv/bin/activate
    6. Install the required libraries into this environment: pip install -r requirements.txt
    7. Run Jupyter Lab: jupyter lab
    8. Within Jupyter Lab, change directories into the respective chapter and open the python notebooks.

    Table of Contents

    The code in this repo is organized into chapters (shown in the table). Each chapter contains code for the various concepts and tools discussed in the book.

    Chapter Description Code
    1 Understanding Multi-Agent Systems no code
    2 Building Your First Multi-Agent Application Your first multi-agent application
    Orchestrating groups of agents
    3 The User Experience (UX) for Multi-Agent Systems no code
    4 Interface Agents Interface library (built from scratch)
    Implementing an interface agent notebook

    Questions and Feedback

    If you have any questions or feedback about the book or the code in this repository, please feel free to open an issue.

    For questions about the AutoGen framework, you can also visit the AutoGen GitHub repository or the AutoGen documentation.

    Citation

    If you find this book or code useful for your research, please consider citing it:

    @book{multiagentsystems2024,
      author       = {Dibia, Victor},
      title        = {Multi-Agent Systems with AutoGen},
      publisher    = {Manning},
      year         = {2024},
      isbn         = {9781633436145},
      url          = {https://www.manning.com/books/multi-agent-systems-with-autogen},
      github       = {https://github.com/victordibia/designing-multiagent-systems}
    }
    
    Visit original content creator repository https://github.com/victordibia/multiagent-systems-with-autogen
  • bimstandards

    BIMstandards

    Ce site destiné à promouvoir l’interopérabilité et l’openBIM, et à faciliter leur implémentation dans les logiciels-métier, est développé et mis à jour par Alexandre Grignon.

    BIMstandards utilise le service GitHub Pages ; il est ainsi possible de contribuer à son développement en créant un fork du dépôt GitHub.

    Comment contribuer ?

    Pour contribuer au site BIMstandards, il faut d’abord créer un compte GitHub (gratuit).

    Faire une remarque

    Si vous avez une suggestion pour corriger, améliorer, modifier une page du site, vous pouvez d’abord formuler une remarque dans l’onglet “Issues”. N’oubliez pas de vérifier que la suggestion n’existe pas déjà.

    Chaque remarque sera visible publiquement, et pourra ainsi faire l’objet d’une discussion entre les contributeurs du site.

    Proposer une modification

    Pour les plus aguerris à la technologie utilisée par le site (GitHub Pages), il est également possible de proposer des améliorations en modifiant directement la source du site. Chaque proposition sera soumise à validation avant intégration.

    1. Créer une nouvelle branche du dépôt.
    2. Cloner cette branche en local sur votre ordinateur à l’aide du logiciel GitHub Desktop.
    3. Effectuer les modifications souhaitées à l’aide d’un éditeur de texte compatible Markdown.
    4. Lorsque les modifications sont terminées, créer un commit avec le logiciel GitHub Desktop puis synchroniser la branche.
    5. Toujours avec GitHub Desktop, effectuer une demande de prise en compte des modifications (Pull Request).

    Développeur

    Exécuter bimstandards en local sur MacOS

    1. Cloner le dépôt dans le dossier “Sites” du Mac avec l’application GitHub Desktop.
    2. Dans le Terminal, naviguer vers le dossier “bimstandards” avec cd Sites/bimstandards
    3. Lancer Jekyll avec la commande :
    • bundle exec jekyll serve --incremental
    • bundle exec jekyll build --config _config.yml,_config_beta.yml
    1. Le site est accessible à l’adresse http://localhost:4000
    2. Pour arrêter Jekyll, appuyer sur ctrl+c

    Exécuter bimstandards en local sur Windows

    1. Cloner le dépôt dans le dossier “Documents/GitHub” avec l’application GitHub Desktop.
    2. Installer WSL, puis Ubuntu https://korben.info/installer-wsl2-windows-linux.html
    3. Installer Jekyll https://jekyllrb.com/docs/installation/windows/
    4. Dans PowerShell, naviguer vers le dossier “bimstandards” avec cd Documents/GitHub/bimstandards
    5. Lancer Jekyll avec la commande :
    • sudo bundle exec jekyll serve --incremental
    • sudo bundle exec jekyll build --config _config.yml,_config_beta.yml
    1. Le site est accessible à l’adresse http://localhost:4000
    2. Pour arrêter Jekyll, appuyer sur ctrl+c

    Mise à jour environnement github-pages

    bundle update github-pages

    Licence

    L’ensemble du site est placé sous licence Creative Commons Attribution – Partage dans les Mêmes Conditions 4.0 International (CC BY-SA 4.0).

    Visit original content creator repository
    https://github.com/bimstandards/bimstandards

  • box-of-life

    Box full of Life

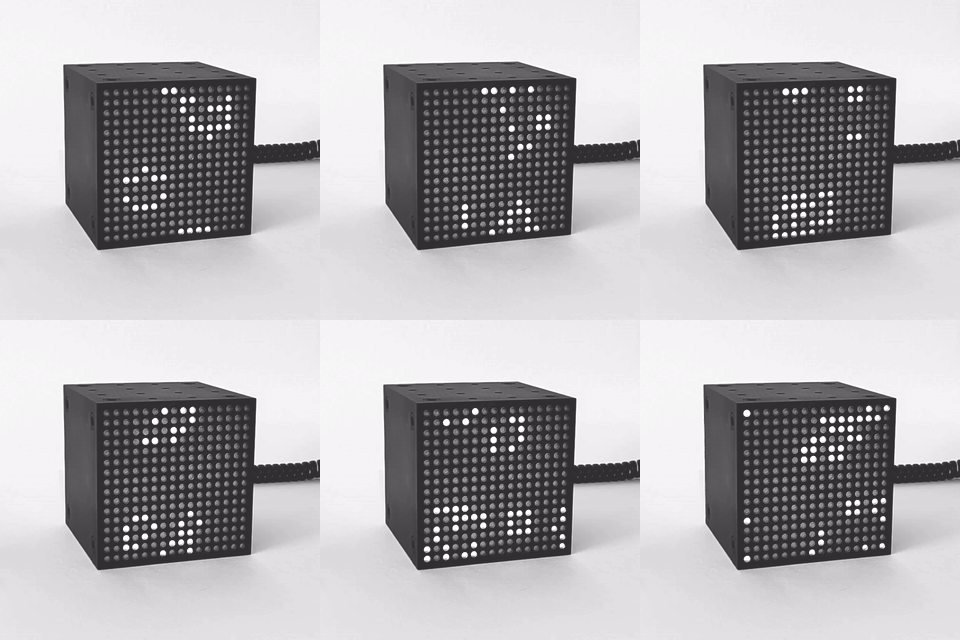
    Modification of Ikea FREKVENS with Raspberry Pi Pico to play Conway’s Game of Life.

    Features

    • Start with random pattern and play game of life
    • If stable pattern or oscillator with period 2 occurs game will be restarted.
    • Control:
      • Red button
        • short press – turn ON and cycle LED brightness
        • long press – turn OFF
      • Yellow button
        • short press – cycle speed
        • long press – restart life

    Firmware

    FW is written in MicroPython. Use Thonny or mpremote to load content of src directory into Pico.

    cd src
    # copy everything (.) in to remote (:)
    mpremote cp -r . :
    # run main.py to see stdout
    mpremote run main.py

    Ikea FREKVENS HW Modification

    One need to disassembly Ikea FREKVENS box, remove original MCU board and connect RPi Pico. Steps:

    1. Disassembly, there are some tutorials already, e.g. here or here
    2. Remove original MCU (green) PCB and solder connector in place (or directly connect according to the following table via wires).
    3. (optional) disassembly power supply block and replace AC output plug with 3D printed USB connector holder. USB data pins are available on back side of RPi Pico as test points.

    Connection

    Board Pin/Wire RPi Pico PIN Note
    LED PCB 1 (Vcc) VSYS
    LED PCB 2 GPIO 4 En
    LED PCB 3 GPIO 3 Data
    LED PCB 4 GPIO 2 Clk
    LED PCB 5 GPIO 5 Latch
    LED PCB 6 (Gnd) GND
    Buttons Red wire GND
    Buttons Black wire GPIO 10 Yellow button
    Buttons White wire GPIO 11 Red button

    Connection between power supply and main PCB (4V and GND) is same.

    If USB connection is used, one must de-solder diode that are between VUSB and VSYS from Pico PCB. (here’s why)

    Ideas for improvements

    • Add predefined startup (e.g. glider)
    • Performance improvement (use SPI or PIO for communication, speed up game generation computation)
    Visit original content creator repository https://github.com/ah01/box-of-life
  • awscli-plugin-endpoint

    awscli-plugin-endpoint

    This awscli plugin provides service endpoint configuration per service on profile.


    Installation

    The easiest way to install awscli-plugin-endpoint is to use pip:

    $ pip install awscli-plugin-endpoint
    

    You can also install the latest package from GitHub source which can contain changes not yet pushed to PyPI:

    $ pip install git+https://github.com/wbingli/awscli-plugin-endpoint.git
    

    or, if you install awscli via Homebrew, which bundles its own python, install as following:

    $ /usr/local/opt/awscli/libexec/bin/pip install awscli-plugin-endpoint
    

    Regardless of the installation method, make note of the package installation path (e.g. ~/Library/Python/3.7/lib/python/site-packages). It will be needed if you are using AWS CLI v2.


    Getting Started

    Before using awscli-plugin-endpoint plugin, you need to configure awscli first.

    MUST: Once that’s done, to enable awscli-plugin-endpoint plugin, you can run:

    $ aws configure set plugins.endpoint awscli_plugin_endpoint
    

    The above command adds below section to your aws config file. You can also directly edit your ~/.aws/config with below configuration.

    [plugins]
    endpoint = awscli_plugin_endpoint
    

    If you are configuring AWS CLI v2 to use the endpoint plugin, you will need to add an additional configuration setting, replacing “site-packages-path” with the installation path noted above:

    $ aws configure set plugins.cli_legacy_plugin_path site-packages-path
    

    The configuration file will now have two values in the plugin section:

    [plugins]
    endpoint = awscli_plugin_endpoint
    cli_legacy_plugin_path = site-packages-path
    

    To add endpoint configure to a profile(assuming you have a local profile), you can run:

    $ aws configure --profile local set dynamodb.endpoint_url http://localhost:8000
    

    The above command adds below section to your profile:

    [profile local]
    dynamodb =
        endpoint_url = http://localhost:8000
    

    Now you can access your local dynamodb just use profile:

    $ aws dynamodb list-tables --profile local
    

    One more example with S3 configuration

    Add endpoint configuration to the profile:

    $ aws configure --profile wasabi set s3.endpoint_url https://s3.wasabisys.com
    

    The profile will looks like below:

    [profile wasabi]
    region = us-east-1
    s3 =
        endpoint_url = https://s3.wasabisys.com
    

    Now you can use aws s3 command with this profile as following:

    $ aws s3 ls --profile wasabi
    

    One more thing, the endpoint is technically per sub command. Take S3 as example, above S3 configuration will not work for S3 low level CLI aws s3api. To make s3api work with this endpoint, you should add endpoint to this sub command as well:

    [profile wasabi]
    region = us-east-1
    s3 =
        endpoint_url = https://s3.wasabisys.com
    s3api =
        endpoint_url = https://s3.wasabisys.com
    

    Now you can use aws s3api command with this profile as following:

    $ aws s3api --profile wasabi list-buckets
    

    Working with Secure Connections

    By default, awscli verifies the certificates presented for all HTTPS requests.
    There are two options for working with self-signed or otherwise untrusted
    certificates:

    • ca_bundle

      If the certificate is long-lived, or any new certificates will be issued by
      a long-lived certificate authority, you may want to provide an alternate
      set of trusted certificates with ca_bundle. This is comparable to the
      --ca-bundle command line option, and may be specified either per-profile
      or per-subcommand:

      [profile local1]
      ca_bundle = /path/to/bundle.crt
      s3 =
          endpoint_url = https://localhost:8000
      
      [profile local2]
      ec2 =
          ca_bundle = /path/to/another-bundle.crt
          endpoint_url = https://localhost:8888
      
    • verify_ssl

      If the certificate will be frequently refreshed, you may want to simply
      disable verification with verify_ssl = false. This is comparable to the
      --no-verify-ssl command line option:

      [profile local]
      dynamodb =
          verify_ssl = false
          endpoint_url = https://localhost:8000
      

    Visit original content creator repository
    https://github.com/wbingli/awscli-plugin-endpoint

  • message-pusher

    message-pusher logo

    消息推送服务

    ✨ 搭建专属于你的消息推送服务,支持多种消息推送方式,支持 Markdown,仅单可执行文件,开箱即用✨

    license release docker pull release GoReportCard

    程序下载 · 部署教程 · 使用教程 · 意见反馈 · 在线演示

    Note:官方部署站 https://msgpusher.com 现已上线,当前开放注册,欢迎使用。如果收到积极反馈未来可以考虑换用延迟更低的服务器。

    Warning:从 v0.3 版本升级到 v0.4 版本需要手动迁移数据库,具体方法见迁移数据库

    描述

    1. 多种消息推送方式
      • 邮件消息,
      • 微信测试号,
      • QQ,
      • 企业微信应用号,
      • 企业微信群机器人
      • 飞书自建应用
      • 飞书群机器人,
      • 钉钉群机器人,
      • Bark App,
      • WebSocket 客户端(官方客户端接入文档),
      • Telegram 机器人,
      • Discord 群机器人,
      • 腾讯云自定义告警:免费的短信提醒,
      • 群组消息:可以将多个推送通道组合成一个群组,然后向群组发送消息,可以实现一次性推送到多个渠道的功能,
      • 自定义消息:可以自定义消息请求 URL 和请求体格式,实现与其他服务的对接,支持众多第三方服务
    2. 支持自定义 Webhook,反向适配各种调用平台,你可以接入各种已有的系统,而无需修改其代码。
    3. 支持在 Web 端编辑 & 管理发送的消息,新消息发送后 Web 端即时刷新
    4. 支持异步消息发送。
    5. 支持用户管理,支持多种用户登录注册方式:
    6. 支持 Markdown。
    7. 支持 Cloudflare Turnstile 用户校验。
    8. 支持在线发布公告,设置关于界面以及页脚。
    9. API 兼容其他消息推送服务,例如 Server 酱

    用途

    1. 整合进自己的博客系统,每当有人登录时发微信消息提醒
    2. 在进行深度学习模型训练时,在每个 epoch 结束后将关键数据发送到微信以方便及时监控。
    3. 在各种脚本运行结束后发消息提醒,例如监控 GitHub Star 数量的脚本,又例如自动健康填报的脚本,用来通知运行结果。
    4. 其他系统提供消息推送功能。

    部署

    通过 Docker 部署

    部署:docker run -d --restart always --name message-pusher -p 3000:3000 -e TZ=Asia/Shanghai -v /home/ubuntu/data/message-pusher:/data justsong/message-pusher

    如果无法拉去,请将 justsong/message-pusher 替换为 ghcr.io/songquanpeng/message-pusher

    更新:docker run --rm -v /var/run/docker.sock:/var/run/docker.sock containrrr/watchtower -cR

    开放的端口号为 3000,之后用 Nginx 配置域名,反代以及 SSL 证书即可,具体参考详细部署教程

    数据将会保存在宿主机的 /home/ubuntu/data/message-pusher 目录(只有一个 SQLite 数据库文件),请确保该目录存在且具有写入权限,或者更改为合适的目录。

    Nginx 的参考配置:

    server{
       server_name msgpusher.com;  # 请根据实际情况修改你的域名
       
       location / {
              client_max_body_size  64m;
              proxy_http_version 1.1;
              proxy_pass http://localhost:3000;  # 请根据实际情况修改你的端口
              proxy_set_header Host $host;
              proxy_set_header X-Forwarded-For $remote_addr;
              proxy_cache_bypass $http_upgrade;
              proxy_set_header Accept-Encoding gzip;
       }
    }
    

    之后使用 Let’s Encrypt 的 certbot 配置 HTTPS:

    # Ubuntu 安装 certbot:
    sudo snap install --classic certbot
    sudo ln -s /snap/bin/certbot /usr/bin/certbot
    # 生成证书 & 修改 Nginx 配置
    sudo certbot --nginx
    # 根据指示进行操作
    # 重启 Nginx
    sudo service nginx restart

    手动部署

    1. GitHub Releases 下载可执行文件或者从源码编译:
      git clone https://github.com/songquanpeng/message-pusher.git
      cd message-pusher/web
      npm install
      npm run build
      cd ..
      go mod download
      go build -ldflags "-s -w" -o message-pusher
    2. 运行:
      chmod u+x message-pusher
      ./message-pusher --port 3000 --log-dir ./logs
    3. 访问 http://localhost:3000/ 并登录。初始账号用户名为 root,密码为 123456

    如果服务需要长久运行,只是单纯地启动是不够的,详细部署教程

    注意

    如果需要使用 WebSocket 客户端推送功能,则 Nginx 的配置文件中 proxy_read_timeoutproxy_send_timeout 务必设置超过 1 分钟。

    推荐设置:

    proxy_read_timeout 300s;
    proxy_send_timeout 300s;   
    

    配置

    系统本身仅需要下载一个可执行文件即可开始使用,无其他依赖。

    你可以通过设置环境变量或者命令行参数进行配置。

    等到系统启动后,使用 root 用户登录系统并做进一步的配置,默认密码为 123456

    环境变量

    1. REDIS_CONN_STRING:设置之后将使用 Redis 作为请求频率限制的存储,而非使用内存存储。
      • 例子:REDIS_CONN_STRING=redis://default:redispw@localhost:49153
    2. SESSION_SECRET:设置之后将使用固定的会话密钥,这样系统重新启动后已登录用户的 cookie 将依旧有效。
      • 例子:SESSION_SECRET=random_string
    3. SQL_DSN:设置之后将使用指定数据库而非 SQLite。
      • 例子:SQL_DSN=root:123456@tcp(localhost:3306)/message-pusher

    注意:使用 Docker 部署时,请使用 -e key=value 设置环境变量。

    例子:docker run -e SESSION_SECRET=random_string ...

    命令行参数

    1. --port <port_number>: 指定服务器监听的端口号,默认为 3000
      • 例子:--port 3000
    2. --log-dir <log_dir>: 指定日志文件夹,如果没有设置,日志将不会被保存。
      • 例子:--log-dir ./logs
    3. --version: 打印系统版本号并退出。

    进一步的配置

    1. 系统设置:
      1. 填写服务器地址。
      2. 配置登录注册选项,如果系统不对外开放,请取消选择允许新用户注册
      3. 配置 SMTP 服务,可以使用 QQ 邮箱的 SMTP 服务。
      4. 其他配置可选,请按照页面上的指示完成配置。
    2. 个人设置:
      1. 点击更新用户信息更改默认用户名和密码。
      2. 点击绑定邮箱地址绑定邮箱以启用邮件消息推送方式。
    3. 推送设置:
      1. 设置默认推送方式,默认为通过邮件进行推送。
      2. 设置推送 token,用以推送 API 调用鉴权,如果不需要留空即可。
      3. 设置其他推送方式,按照页面上的指示即可,完成配置后点击对应的测试按钮即可测试配置是否成功。
    4. 其他设置:如果系统对外提供服务,本系统也提供了一定的个性化设置功能,你可以设置关于界面和页脚,以及发布公告。

    用法

    1. 消息推送 API URL:https://<domain>/push/<username>
      • 将上面的 <domain> 以及 <username> 替换为真实值,例如:https://push.mydomain.cn/push/admin
    2. GET 请求方式:https://<domain>/push/<username>?title=<标题>&description=<描述>&content=<Markdown 文本>&channel=<推送方式>&token=<推送 token>
      1. title:选填,受限于具体的消息推送方式,其可能被忽略。
      2. description:必填,可以替换为 desp
      3. content:选填,受限于具体的消息推送方式,Markdown 语法的支持有所区别。
      4. channel:选填,如果不填则系统使用你在后台设置的默认推送通道。注意,此处填的是消息通道的名称,而非类型。可选的推送通道类型有:
        1. email:通过发送邮件的方式进行推送(使用 titledescription 字段设置邮件主题,使用 content 字段设置正文,支持完整的 Markdown 语法)。
        2. test:通过微信测试号进行推送(使用 description 字段设置模板消息内容,不支持 Markdown)。
        3. corp_app:通过企业微信应用号进行推送(仅当使用企业微信 APP 时,如果设置了 content 字段,titledescription 字段会被忽略;使用微信中的企业微信插件时正常)。
        4. lark_app:通过飞书自建应用进行推送。
        5. corp:通过企业微信群机器人推送(设置 content 字段则将渲染 Markdown 消息,支持 Markdown 的子集;设置 description 字段则为普通文本消息)。
        6. lark:通过飞书群机器人进行推送(注意事项同上)。
        7. ding:通过钉钉群机器人进行推送(注意事项同上)。
        8. bark:通过 Bark 进行推送(支持 titledescription 字段)。
        9. client:通过 WebSocket 客户端进行推送(支持 titledescription 字段)。
        10. telegram:通过 Telegram 机器人进行推送(descriptioncontent 字段二选一,支持 Markdown 的子集)。
        11. discord:通过 Discord 群机器人进行推送(注意事项同上)。
        12. one_api:通过 OneAPI 协议推送消息到 QQ。
        13. group:通过预先配置的消息推送通道群组进行推送。
        14. custom:通过预先配置好的自定义推送通道进行推送。
        15. tencent_alarm:通过腾讯云监控告警进行推送,仅支持 description 字段。
        16. none:仅保存到数据库,不做推送。
      5. token:如果你在后台设置了推送 token,则此项必填。另外可以通过设置 HTTP Authorization 头部设置此项。
        • 注意令牌有两种,一种是全局鉴权令牌,一种是通道维度的令牌,前者可以鉴权任何通道,后者只能鉴权指定通道。
      6. url:选填,如果不填则系统自动为消息生成 URL,其内容为消息详情。
      7. to:选填,推送给指定用户,如果不填则默认推送给自己,受限于具体的消息推送方式,有些推送方式不支持此项。
        1. @all:推送给所有用户。
        2. user1|user2|user3:推送给多个用户,用户之间使用 | 分隔。
      8. async:选填,如果设置为 true 则消息推送将在后台异步进行,返回结果包含 uuid 字段,可用于后续[获取消息发送状态](./docs/API.md#通过消息 UUID 获取消息发送状态)。
      9. render_mode:选填,
        1. 如果设置为 code,则消息体会被自动嵌套在代码块中进行渲染;
        2. 如果设置为 raw,则不进行 Markdown 解析;
        3. 默认 markdown,即进行 Markdown 解析。
    3. POST 请求方式:字段与上面 GET 请求方式保持一致。
      • 如果发送的是 JSON,HTTP Header Content-Type 请务必设置为 application/json,否则一律按 Form 处理。
      • POST 请求方式下的 token 字段也可以通过 URL 查询参数进行设置。

    各种通道的支持程度:

    通道类型 title description content url to Markdown 支持
    email ✅️ ✅️
    test ✅️ ✅️
    corp_app ✅️
    corp ✅️ ✅️
    lark
    lark_app ❌️
    ding ✅️
    bark ✅️
    client
    telegram
    discord
    tencent_alarm

    注意:

    1. 对于大部分通道,description 字段和 content 是不能同时存在的,如果你只需要文字消息,请使用 description 字段,如果你需要发送 Markdown 消息,请使用 content 字段。
    2. 部分通道的 Markdown 支持实际上是通过 URL 跳转到本系统所渲染的消息详情实现的,其他通道的 Markdown 支持受限于具体的通道,支持的语法并不统一。

    示例:

    Bash 示例
    #!/bin/bash
    
    MESSAGE_PUSHER_SERVER="https://msgpusher.com"
    MESSAGE_PUSHER_USERNAME="test"
    MESSAGE_PUSHER_TOKEN="666"
    
    function send_message {
      # POST Form
      curl -s -X POST "$MESSAGE_PUSHER_SERVER/push/$MESSAGE_PUSHER_USERNAME" \
        -d "title=$1&description=$2&content=$3&token=$MESSAGE_PUSHER_TOKEN" \
        >/dev/null
    }
    
    function send_message_with_json {
      # POST JSON
      curl -s -X POST "$MESSAGE_PUSHER_SERVER/push/$MESSAGE_PUSHER_USERNAME" \
        -H 'Content-Type: application/json' \
        -d '{"title":"'"$1"'","desp":"'"$2"'", "content":"'"$3"'", "token":"'"$MESSAGE_PUSHER_TOKEN"'"}' \
        >/dev/null
    }
    
    send_message 'title' 'description' 'content'

    另一个版本:

    MESSAGE_PUSHER_SERVER="https://msgpusher.com"
    MESSAGE_PUSHER_USERNAME="test"
    MESSAGE_PUSHER_TOKEN="666"
    MESSAGE_PUSHER_CHANNEL="lark"
    
    sendmsg() {
        if [ -t 0 ]; then
            local param="$*"
        else
            local param=$(</dev/stdin)
        fi
        curl -s -o /dev/null --get --data-urlencode "content=${param}" "$MESSAGE_PUSHER_SERVER/push/$MESSAGE_PUSHER_USERNAME?channel=$MESSAGE_PUSHER_CHANNEL&token=$MESSAGE_PUSHER_TOKEN"
    }

    之后便可以进行这样的操作:

    uname -ra | sendmsg
    Python 示例
    import requests
    
    SERVER = "https://msgpusher.com"
    USERNAME = "test"
    TOKEN = "666"
    
    
    def send_message(title, description, content):
        # GET 方式
        # res = requests.get(f"{SERVER}/push/{USERNAME}?title={title}"
        #                    f"&description={description}&content={content}&token={TOKEN}")
    
        # POST 方式
        res = requests.post(f"{SERVER}/push/{USERNAME}", json={
            "title": title,
            "description": description,
            "content": content,
            "token": TOKEN
        })
        res = res.json()
        if res["success"]:
            return None
        else:
            return res["message"]
    
    
    error = send_message("标题", "描述", "**Markdown 内容**")
    if error:
        print(error)
    Go 示例
    package main
    
    import (
       "bytes"
       "encoding/json"
       "errors"
       "fmt"
       "net/http"
       "net/url"
    )
    
    var serverAddress = "https://msgpusher.com"
    var username = "test"
    var token = "666"
    
    type request struct {
       Title       string `json:"title"`
       Description string `json:"description"`
       Content     string `json:"content"`
       URL         string `json:"url"`
       Channel     string `json:"channel"`
       Token       string `json:"token"`
    }
    
    type response struct {
       Success bool   `json:"success"`
       Message string `json:"message"`
    }
    
    func SendMessage(title string, description string, content string) error {
       req := request{
          Title:       title,
          Description: description,
          Content:     content,
          Token:       token,
       }
       data, err := json.Marshal(req)
       if err != nil {
          return err
       }
       resp, err := http.Post(fmt.Sprintf("%s/push/%s", serverAddress, username),
          "application/json", bytes.NewBuffer(data))
       if err != nil {
          return err
       }
       var res response
       err = json.NewDecoder(resp.Body).Decode(&res)
       if err != nil {
          return err
       }
       if !res.Success {
          return errors.New(res.Message)
       }
       return nil
    }
    
    func SendMessageWithForm(title string, description string, content string) error {
       resp, err := http.PostForm(fmt.Sprintf("%s/push/%s", serverAddress, username),
          url.Values{"title": {title}, "description": {description}, "content": {content}, "token": {token}})
       if err != nil {
          return err
       }
       var res response
       err = json.NewDecoder(resp.Body).Decode(&res)
       if err != nil {
          return err
       }
       if !res.Success {
          return errors.New(res.Message)
       }
       return nil
    }
    
    func main() {
       //err := SendMessage("标题", "描述", "**Markdown 内容**")
       err := SendMessageWithForm("标题", "描述", "**Markdown 内容**")
       if err != nil {
          fmt.Println("推送失败:" + err.Error())
       } else {
          fmt.Println("推送成功!")
       }
    }
    C# 示例
    using Newtonsoft.Json;
    using RestSharp;
    
    namespace Demo
    {
        public class Program
        {
            public static void Main(string[] args)
            {
                //推送消息
                var sendMsg = MessagePusherTool.SendMessage("标题", "描述", "**Markdown 内容**");
                if(sendMsg.Success)
                {
                    Console.WriteLine($"推送成功!");
                }
                else
                {
                    Console.WriteLine($"推送失败:{sendMsg.Message}");
                }
            }
        }
    
        /// <summary>
        /// 消息推送工具
        /// 
        /// <para>开源地址:https://github.com/songquanpeng/message-pusher</para>
        /// <para>支持:Framework、Net3.1、Net5、Net6</para>
        /// <para>引用包:</para>
        /// <para>dotnet add package Newtonsoft.Json -v 13.0.2</para>
        /// <para>dotnet add package RestSharp -v 108.0.3</para>
        /// </summary>
        public class MessagePusherTool
        {
            /// <summary>
            /// ServerAddress
            /// </summary>
            public const string ServerAddress = "https://msgpusher.com";
    
            /// <summary>
            /// UserName
            /// </summary>
            public const string UserName = "test";
    
            /// <summary>
            /// Token
            /// </summary>
            public const string Token = "666";
    
            /// <summary>
            /// SendMessage
            /// </summary>
            /// <param name="title">title</param>
            /// <param name="description">description</param>
            /// <param name="content">content</param>
            public static Response SendMessage(string title, string description, string content)
            {
                var requestData = new Request()
                {
                    Title = title,
                    Description = description,
                    Content = content,
                    Token = Token,
                };
                var url = $"{ServerAddress}";
                var client = new RestClient(url);
                var request = new RestRequest($"push/{UserName}", Method.Post);
                request.AddJsonBody(requestData);
                var response = client.Execute(request);
                var responseData = response.Content;
                var responseJson = JsonConvert.DeserializeObject<Response>(responseData);
                return responseJson;
            }
    
            /// <summary>
            /// Request
            /// </summary>
            public class Request
            {
                /// <summary>
                /// Title
                /// </summary>
                [JsonProperty(PropertyName = "title")]
                public string Title { get; set; }
    
                /// <summary>
                /// Description
                /// </summary>
                [JsonProperty(PropertyName = "description")]
                public string Description { get; set; }
    
                /// <summary>
                /// Content
                /// </summary>
                [JsonProperty(PropertyName = "content")]
                public string Content { get; set; }
    
                /// <summary>
                /// URL
                /// </summary>
                [JsonProperty(PropertyName = "url")]
                public string URL { get; set; }
    
                /// <summary>
                /// Channel
                /// </summary>
                [JsonProperty(PropertyName = "channel")]
                public string Channel { get; set; }
    
                /// <summary>
                /// Token
                /// </summary>
                [JsonProperty(PropertyName = "token")]
                public string Token { get; set; }
            }
    
            /// <summary>
            /// Response
            /// </summary>
            public class Response
            {
                /// <summary>
                /// Success
                /// </summary>
                [JsonProperty(PropertyName = "success")]
                public bool Success { get; set; }
    
                /// <summary>
                /// Message
                /// </summary>
                [JsonProperty(PropertyName = "message")]
                public string Message { get; set; }
            }
        }
    }
    Node.js 示例
    const axios = require('axios');
    const querystring = require('querystring');
    
    const MESSAGE_PUSHER_SERVER = 'https://msgpusher.com'
    const MESSAGE_PUSHER_USERNAME = 'test'
    const MESSAGE_PUSHER_TOKEN = '666'
    
    async function send_message(title, description, content) {
      try {
        const postData = querystring.stringify({
          title: title,
          desp: description,
          content: content,
          token: MESSAGE_PUSHER_TOKEN,
        })
    
        const response = await axios.post(`${MESSAGE_PUSHER_SERVER}/push/${MESSAGE_PUSHER_USERNAME}`, postData, {
          headers: {
            'Content-Type': 'application/x-www-form-urlencoded',
          },
        })
        if (response.data.success) {
          return response.data
        }
      } catch (error) {
        if (error.response) {
          return error.response.data
        } else {
          throw error
        }
    
      }
    }
    
    send_message('标题', '描述', '**Markdown 内容**')
      .then((response) => {
        if (response.success) {
          console.log('推送成功:', response)
        } else {
          console.log('推送失败:', response)
        }
      }, (error) => {
        console.log(error.message);
      })

    欢迎 PR 添加更多语言的示例。

    迁移数据库

    此处均以 SQLite 为例,其他数据库请自行修改。我已经让 ChatGPT 翻译成对应的 SQL 版本,见 bin 文件夹,供参考。

    v0.3 迁移到 v0.4

    1. 首先备份你的数据库文件。
    2. 下载最新的 v0.4 版本,启动程序,程序会自动进行数据库表结构的迁移。
    3. 终止程序。
    4. 之后执行脚本:./bin/migrate_v3_to_v4.py,进行数据的迁移。
    5. 重新启动程序即可。

    注意,执行前请确保数据库中 users 表中字段的顺序和脚本中的一致,否则会出现数据错乱的情况。

    其他

    1. v0.3 之前的版本基于 Node.js,你可以切换到 nodejs 分支查看,该版本不再有功能性更新。
    2. v0.3 以及后续版本基于 Gin Template v0.2.1 版本开发。
    3. 如果想要自行编译,请首先编译前端,之后再编译后端,否则会遇到 pattern web/build: no matching files found 问题。
    Visit original content creator repository https://github.com/songquanpeng/message-pusher